Although this post provides downloadable resources, please note that the original lesson originated from the Art teacher Instagram account @smms_studio_art . Please consider giving her a follow because she has amazing lessons!
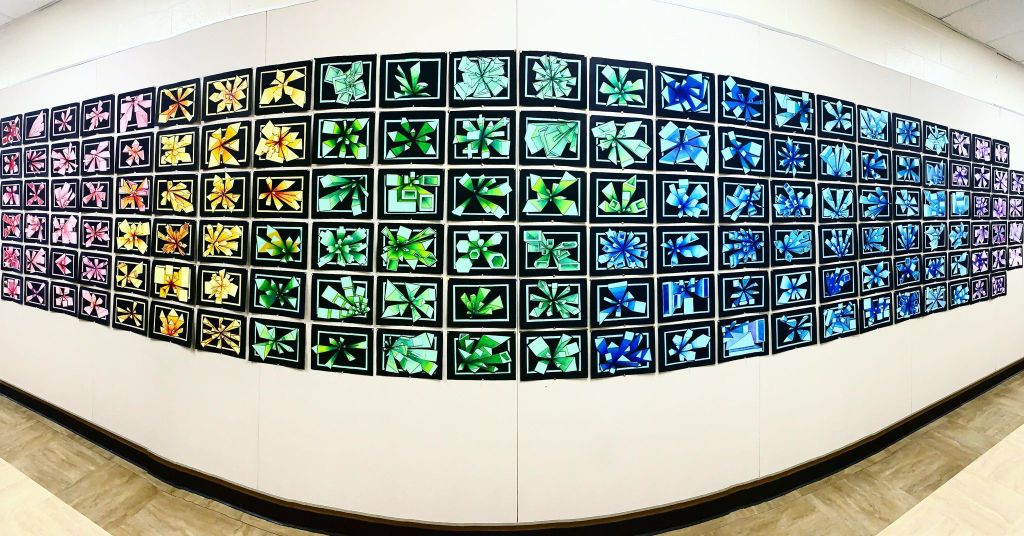
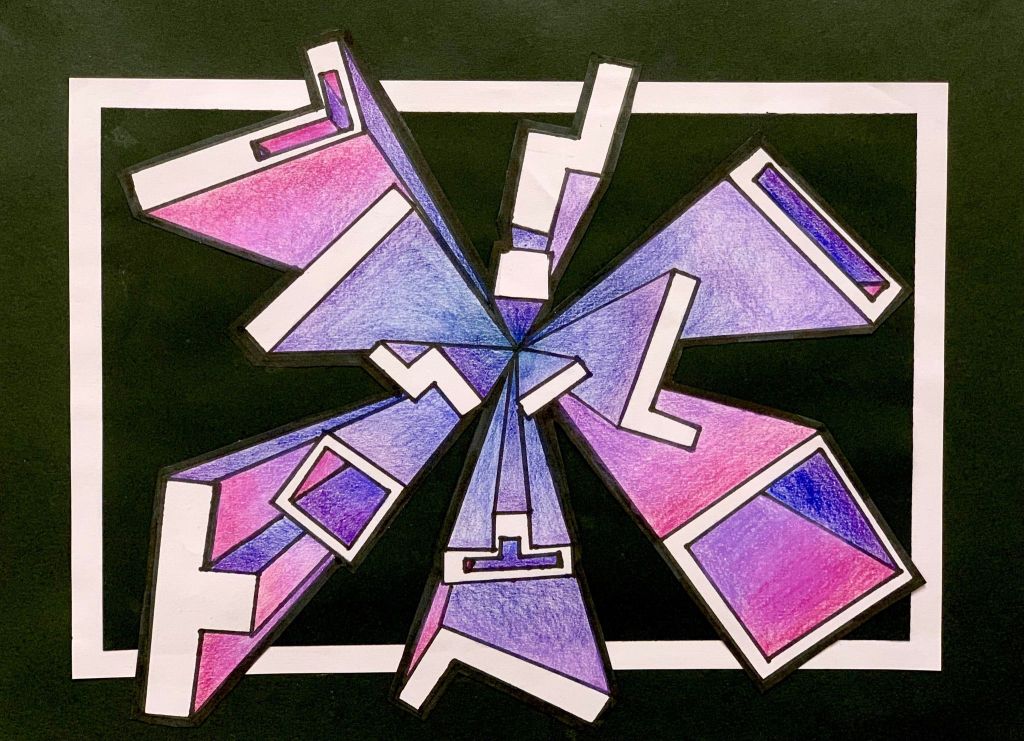
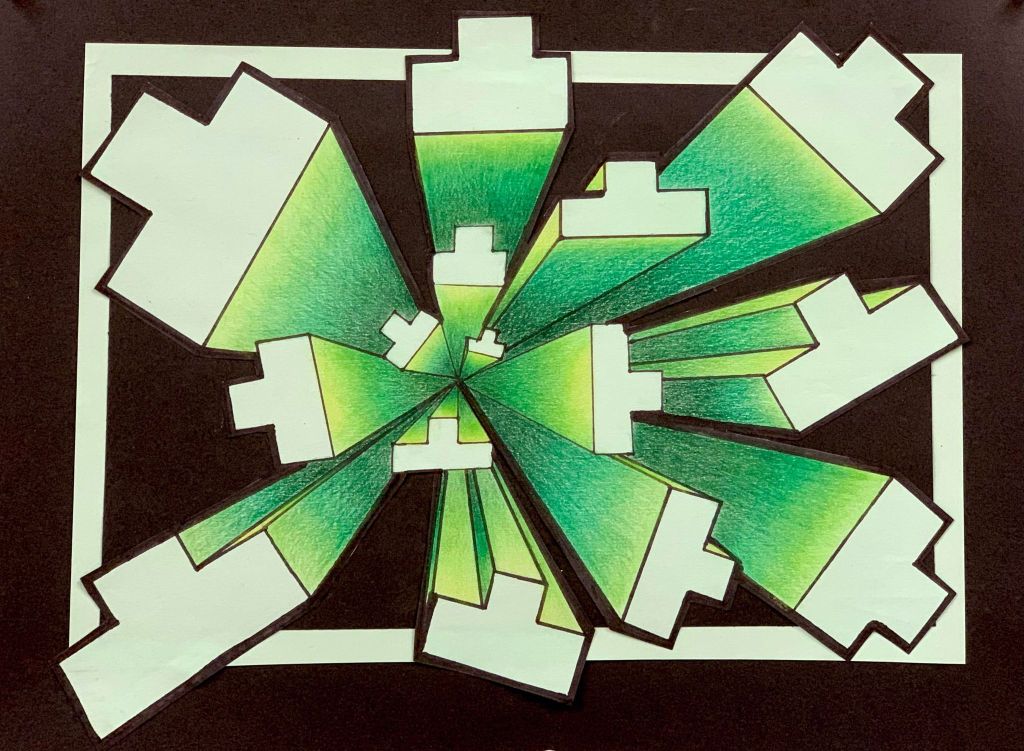
This is a panoramic picture of ALL of my Art 1 student completed one point projects
Click below to access the Intro to One Point Perspective Worksheet. Students completed the fill in the blank notes first and the independent practice was completed after the initial lesson (on their own).
I had my students create rough drafts/thumbnail sketches in their sketchbook before starting on their final paper. This allowed them to practice and mess up as much as possible before starting. I always recommend having students practice beforehand.
Click below to access the Prisma Color Practice Worksheet. After students finished sketching their final drawing, I had them complete the Prisma Color Practice WS. Students were required to complete at least 50% of the WS before moving on to their final project. How you teach color pencil techniques is up to your discretion.
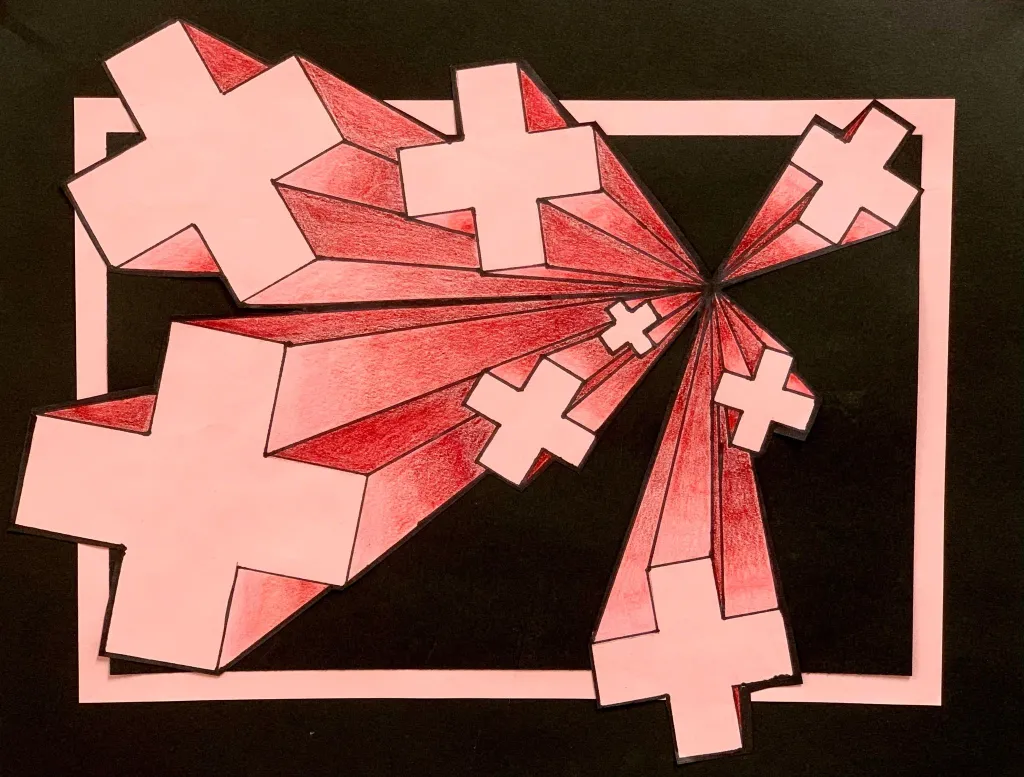
Once students have finished shading their shapes, they were to cut them out and place them on a black piece of paper. Their projects have a “fancy” border but that is optional. Below is a video tutorial on the entire project process.
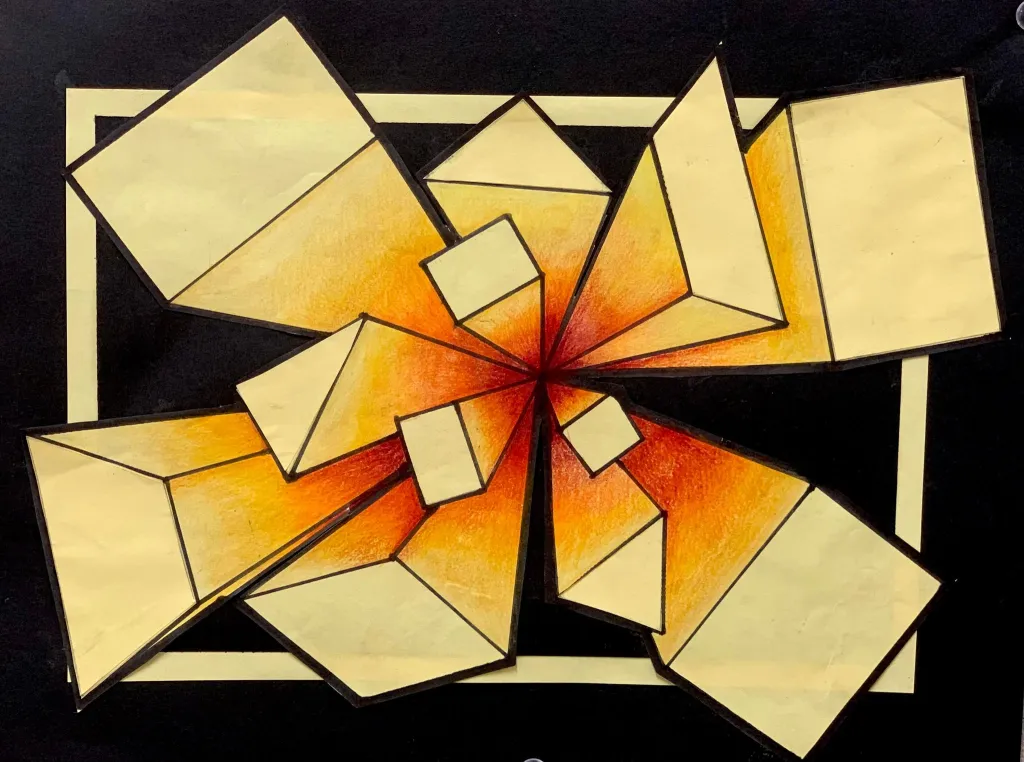
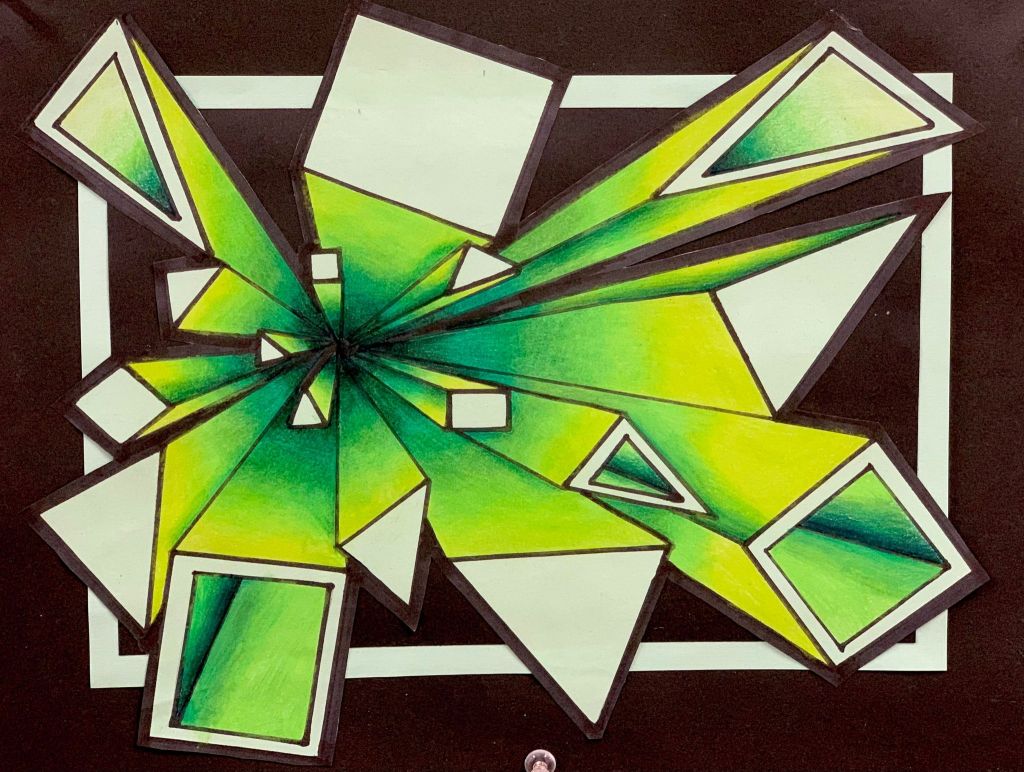
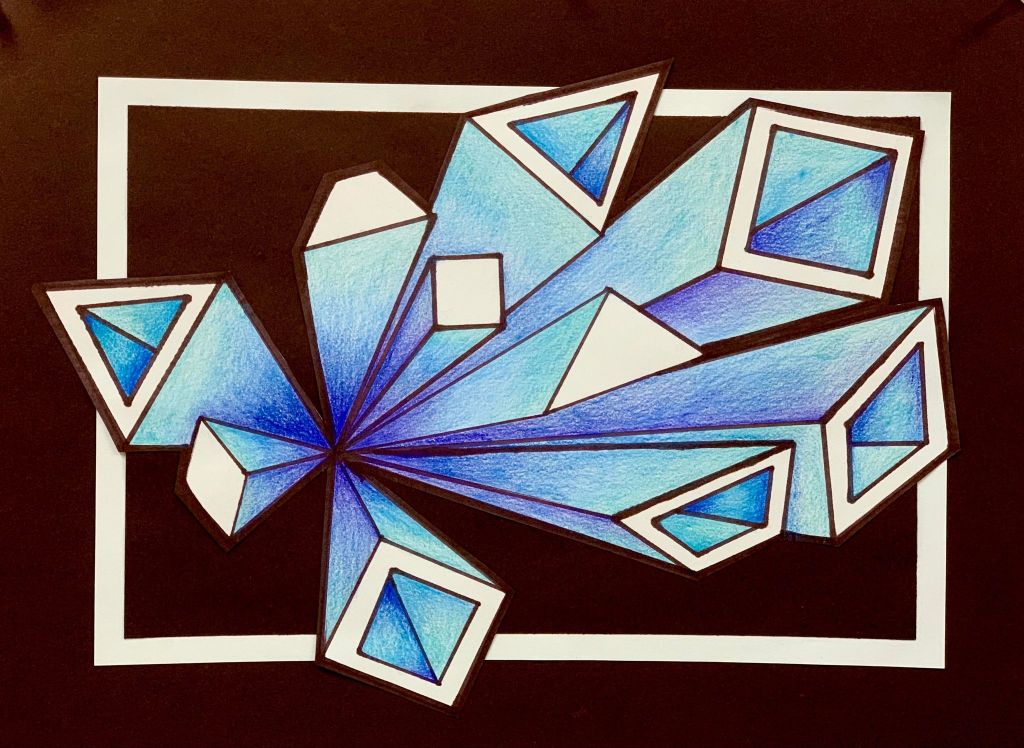
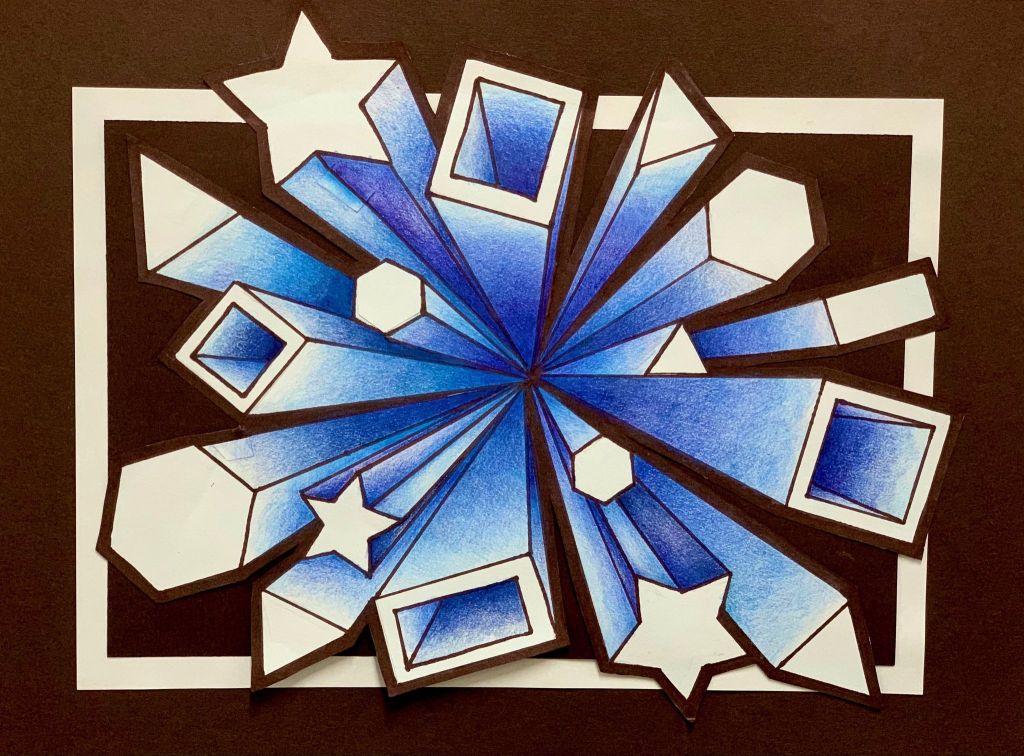
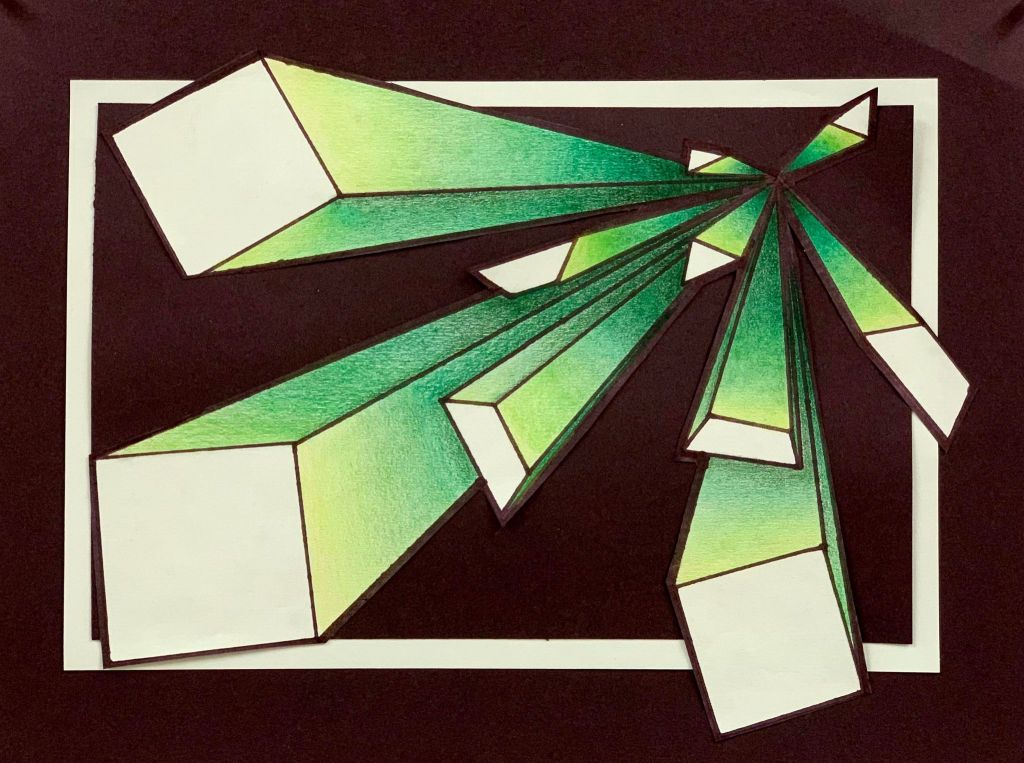
Below are close up examples from 6th and 7th graders.
6th and 7th grade student examples
Click below to access the Peer/Self Reflection Worksheet. Students were tasked with answering the reflection questions after they completed their project. Students then rotated in a counter clock wise pattern to review a fellow classmate’s work.
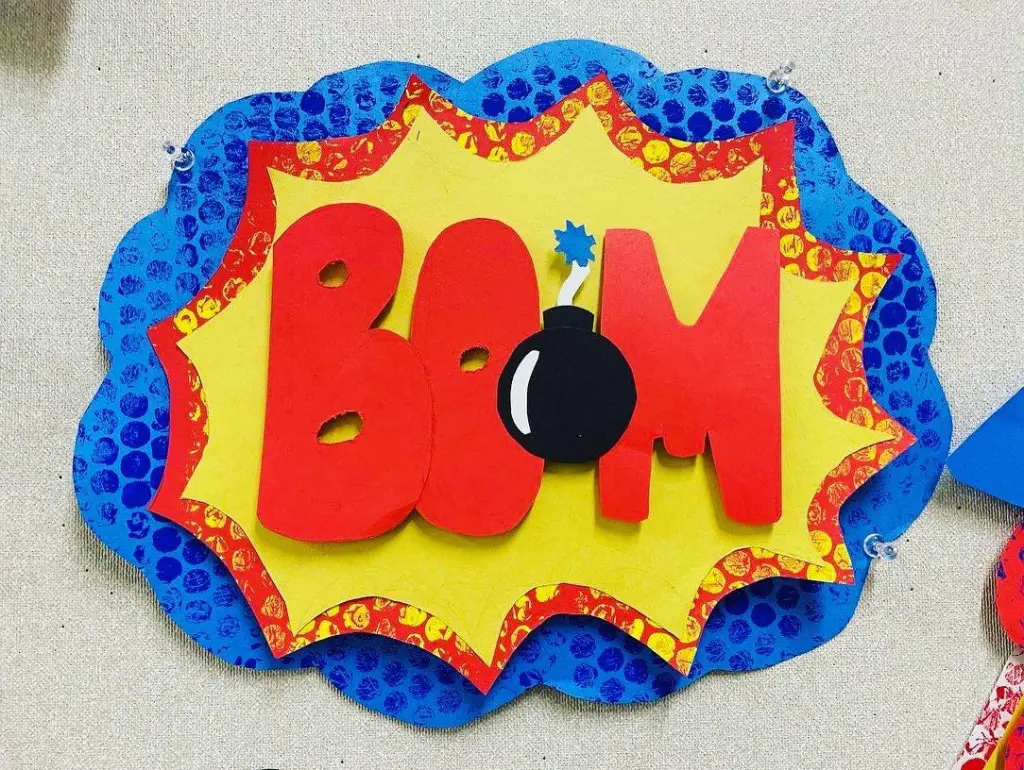
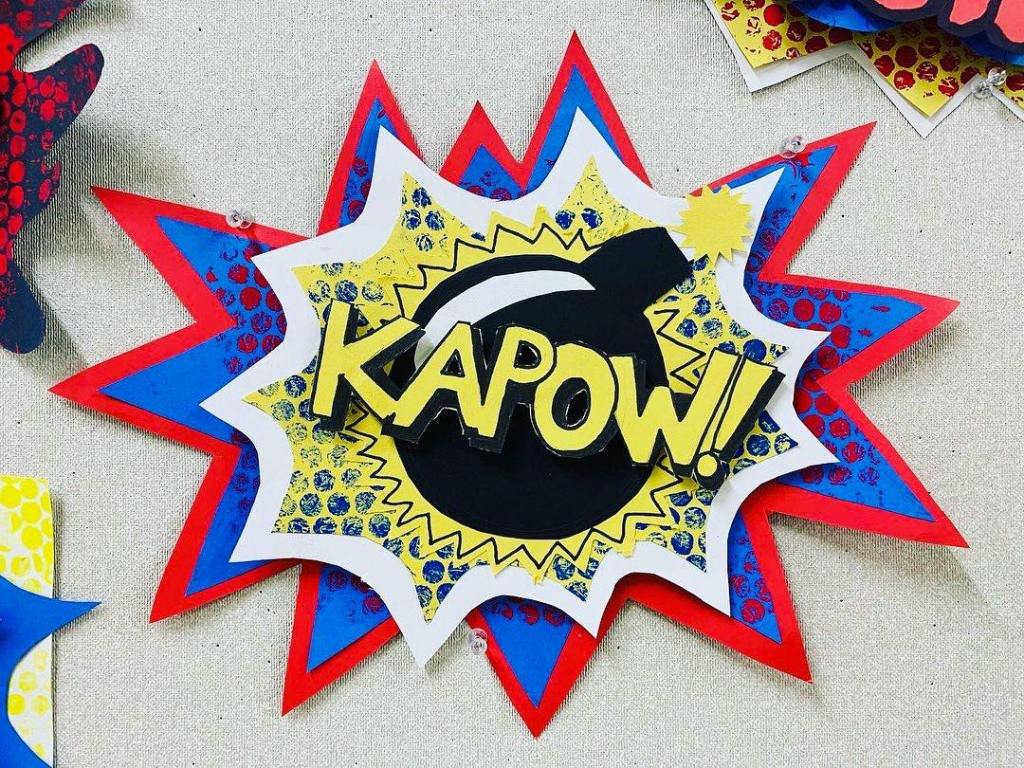
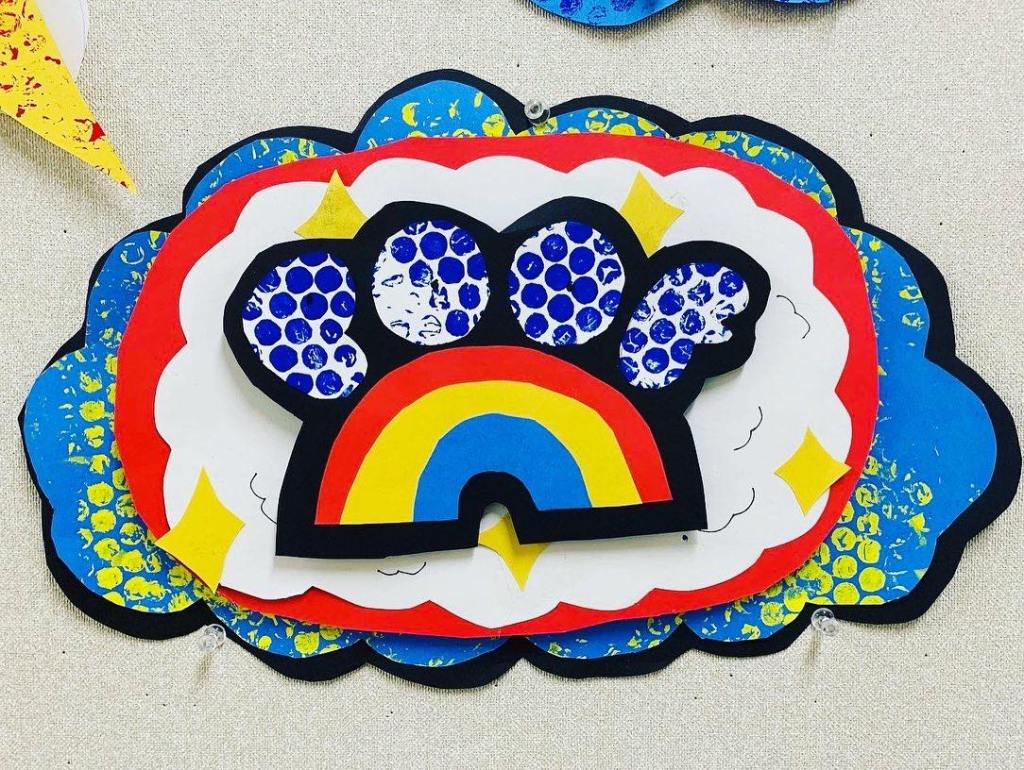
Do you have students who are engaged with graphic novels? Maybe more along the lines of traditional comic books? This lesson is great for 4th – 7th grade students!
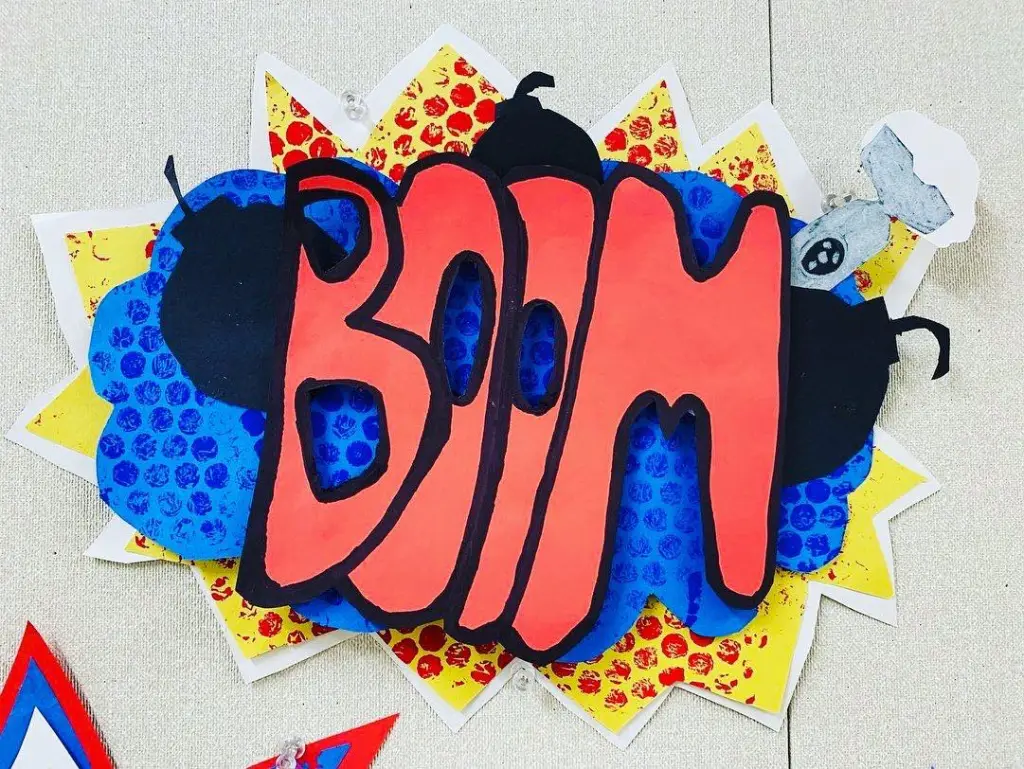
6th grade student example
Here is a Google Slide that introduces Lichtenstein, pop art, ben day dots and reviews primary colors.
Process Overview: Have students brainstorm ideas before starting. This will ensure that they do not waste a bunch of paper and it cuts down on wasting time “thinking” when they should be working. Project was created on basic primary colored construction paper (along with black and white).
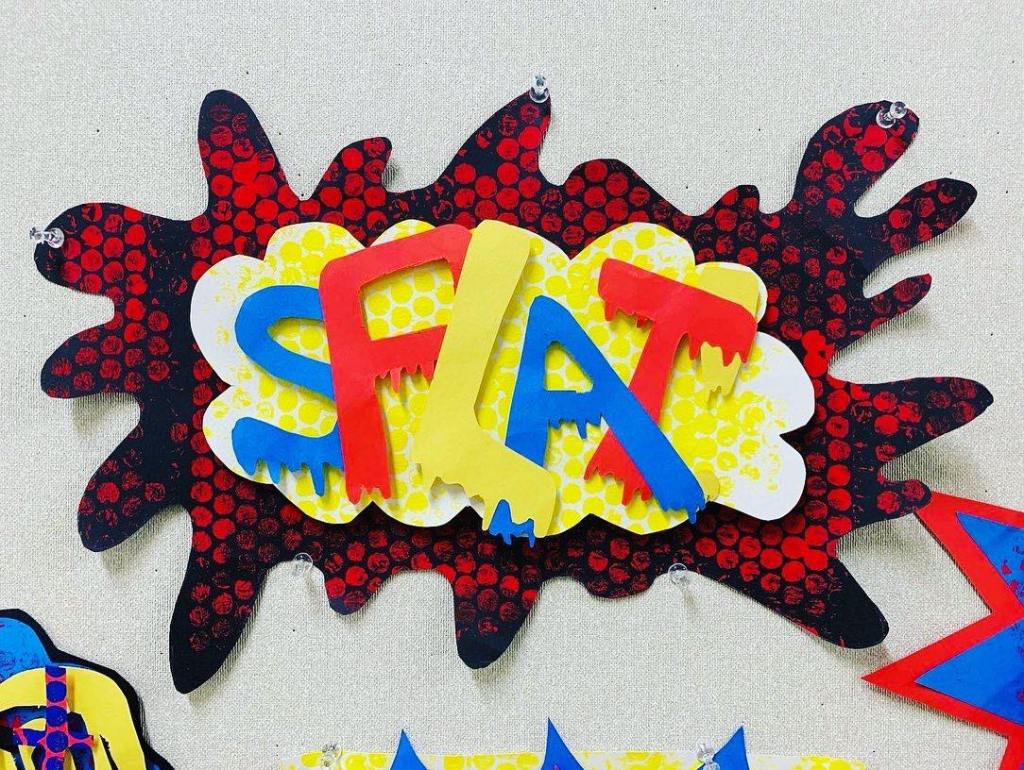
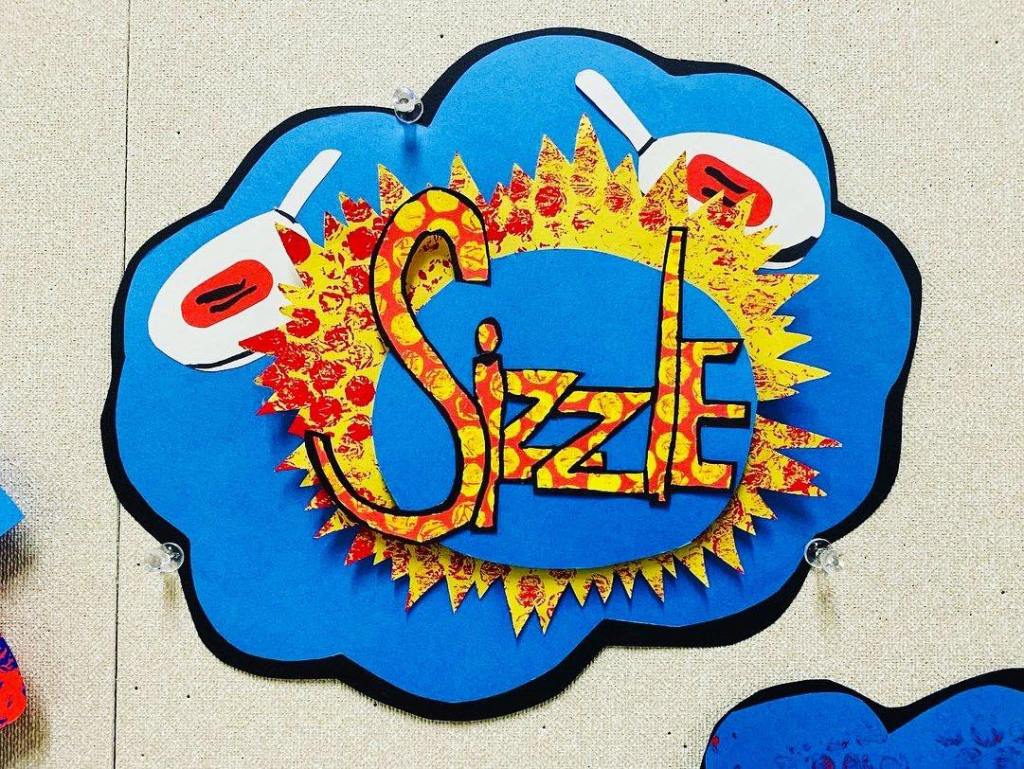
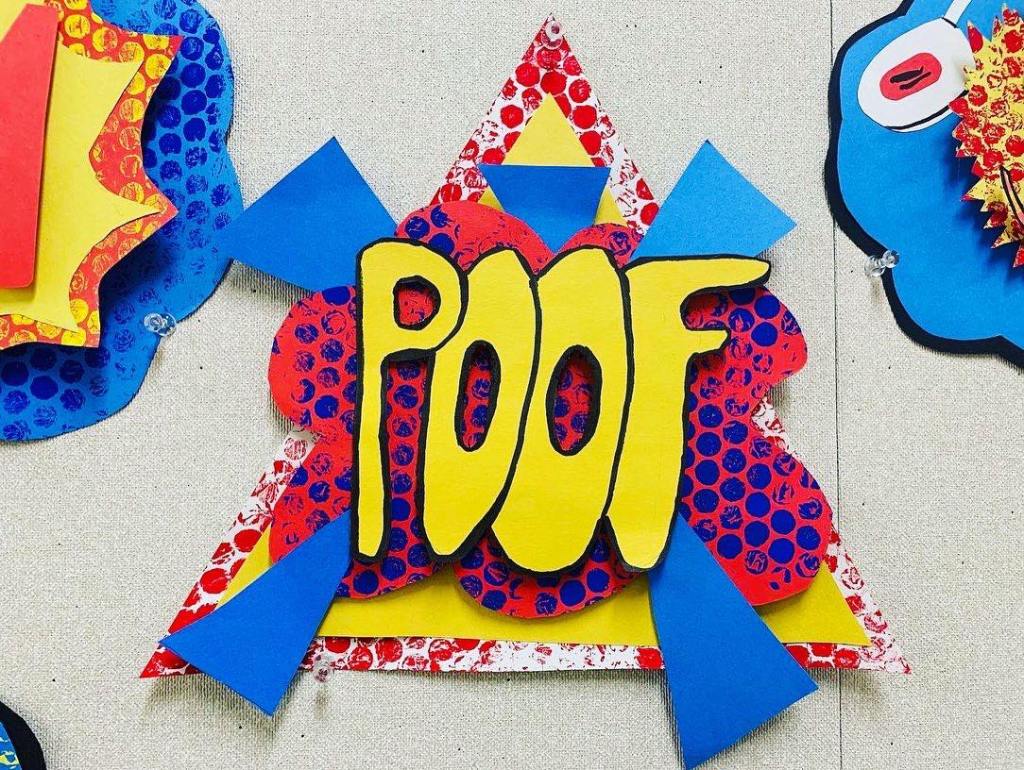
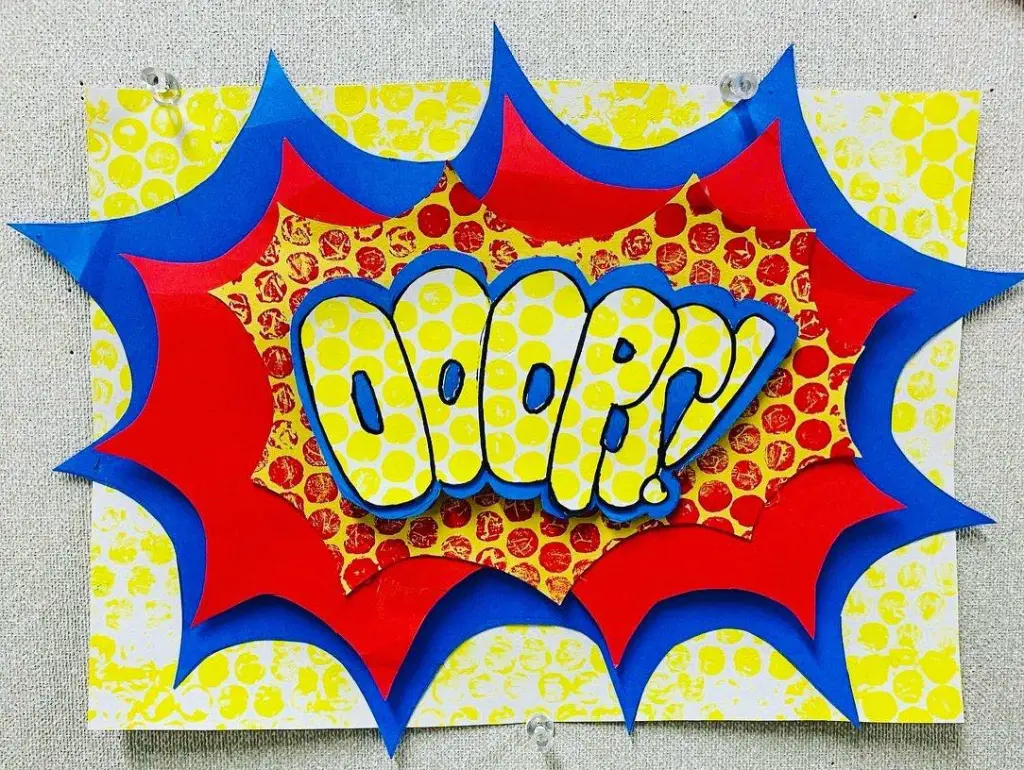
2. Once they have an idea, they should start constructing from the bottom and work their way up through their layers. This will ensure that they are going from big to small. Push their creativity! Don’t just draw basic clouds, lightning bolts and spike like shapes. Encourage them to create an image that represents the onomatopoeia they are focusing on. Example: “crash” could have two cars hitting one another. Every single thing should be cut out before gluing together.
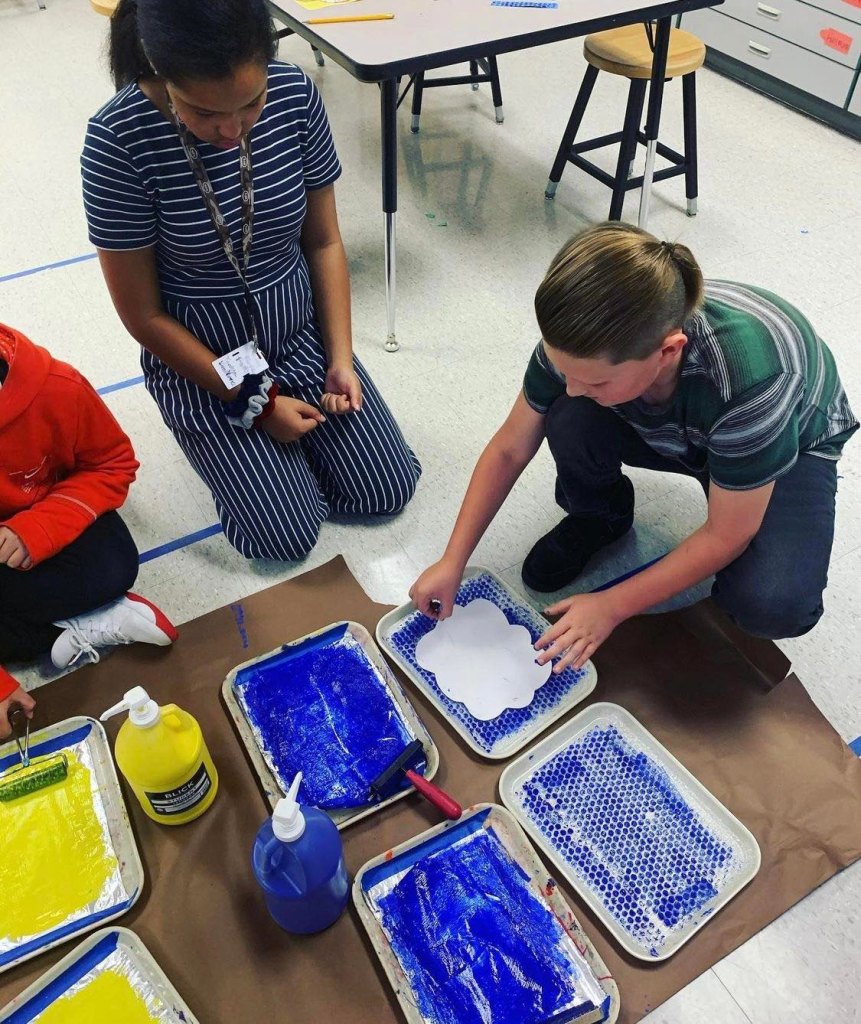
3. Introduce printmaking with bubble wrap to create ben day dot effects. You can have students use extra colors but I only allowed my students to use the primary colors. I’ve taught this technique 2 separate ways. One way is to have students use a basic paint brush and tempera paint to apply the paint. The other option is to teach students how to use a brayer.
5th graders using a brayer to spread paint onto bubble wrap
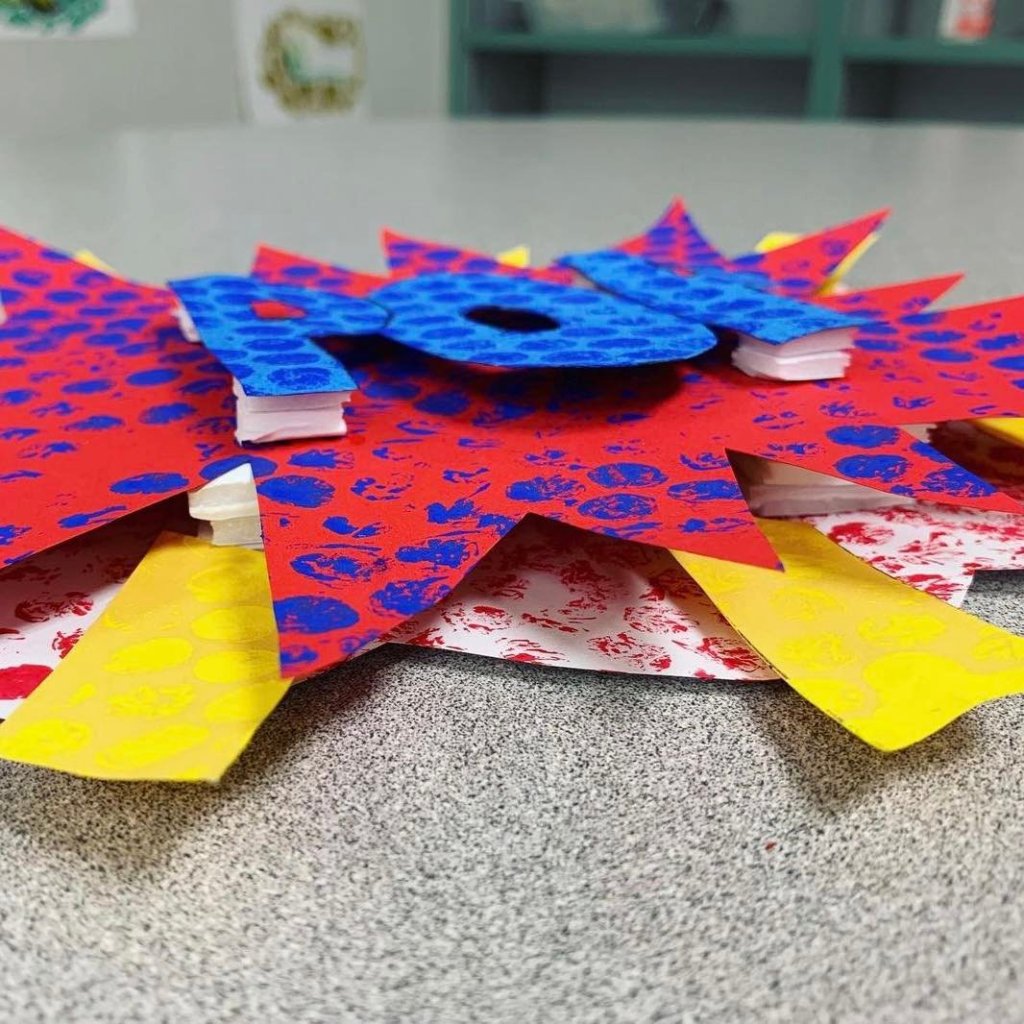
4. After all desired pieces are printed and dried, students will begin attaching their entire sculpture together. You can use cut up pieces of cardboard or foam board to create a 3D layer (slight relief) effect. I supervised my students while they used a hot glue gun to assemble the foam pieces. Regular glue might not be strong enough.
Close up of foam board pieces
Below are student examples. Older students have access to X-Acto knives which creates more dynamic shapes/angles. The following were done by 6th & 7th graders.
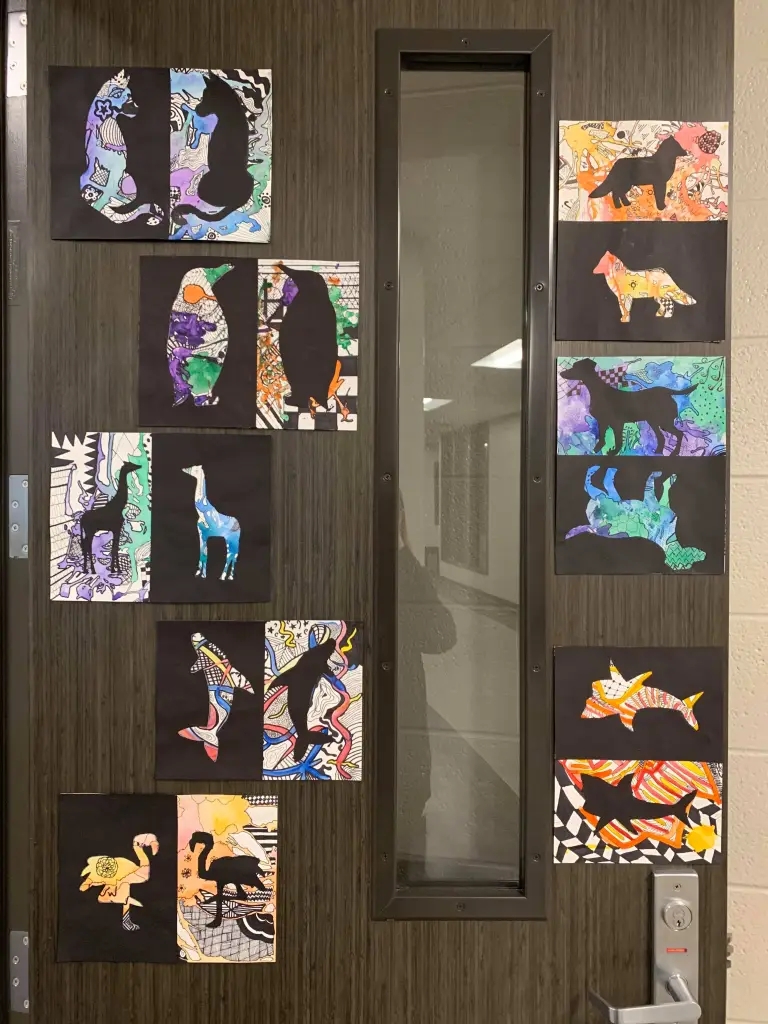
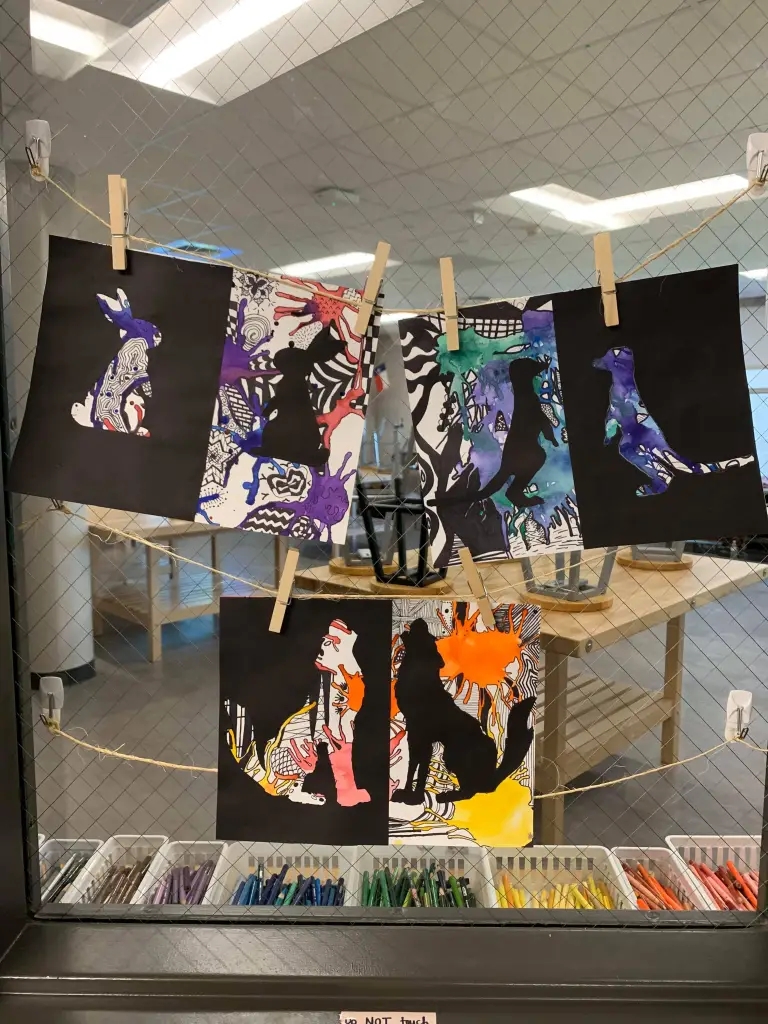
Want a break from your basic positive/negative space Notan project? This project not only covers positive and negative space but it also covers color theory and line variation.
Teacher Sample
Materials:
Watercolor paper
Watercolor
Brushes or pipettes
Straws
Various sharpies/markers/pens with different tip width
Black construction paper
White color pencil
X-acto knives
Cutting pads/boards, to protect tables from knives
Glue, liquid or stick is fine
I introduced the lesson by covering basic color theory. I played the famous Scratch Garden: Advanced Color Song before covering color theory. I had my students take notes in their sketchbook over the various color schemes. I then went over positive and negative space.
Click below to access my Positive and Negative Space slides:
Click below to access the color theory notes. I had 2 copies of this handout laminated on each table. You can print out a copy for each kid and have them glue the copy into their sketchbook instead of having them write out each color scheme.
Click below to access the project handout. This WS provides the project procedural steps, vocab terms and objectives. There is also a zentangle practice section and thumbnail sketch section on the back. I passed out this handout after going over the entire project.
Introducing the entire project and all the vocab terms took 1 class period (47mins). On the second day of the project, we created our abstract watercolor background. You can choose how to create the background but below is a quick video demonstrating how I created their backgrounds. The watercolor background had to be based off of ONE color scheme of their choosing. The following video demonstrates the entire project.
The next 2 days were spent creating zentangle backgrounds. You can either demonstrate how to accurately create certain (popular) zentangles or you can find step-by-step printable sheets online and have the students figure it out themselves. This portion of the project is great for introducing the importance of line variation as well as composition.
After their backgrounds were completed, they drew an animal silhouette of their choice onto black construction paper. Make sure they use white color pencils for this portion. ALSO – Be sure to only give each student HALF a sheet of construction paper. They do not need an entire sheet. Once their animals are drawn out, have them carefully cut out their animal with an x-acto knife. If you care about your tables, you will make sure each kid has a cutting mat underneath their paper before cutting. After their animals are cut out, glue both pieces of paper onto your background in an opposing symmetrical design (see student examples for reference). Then..YOU ARE DONE!
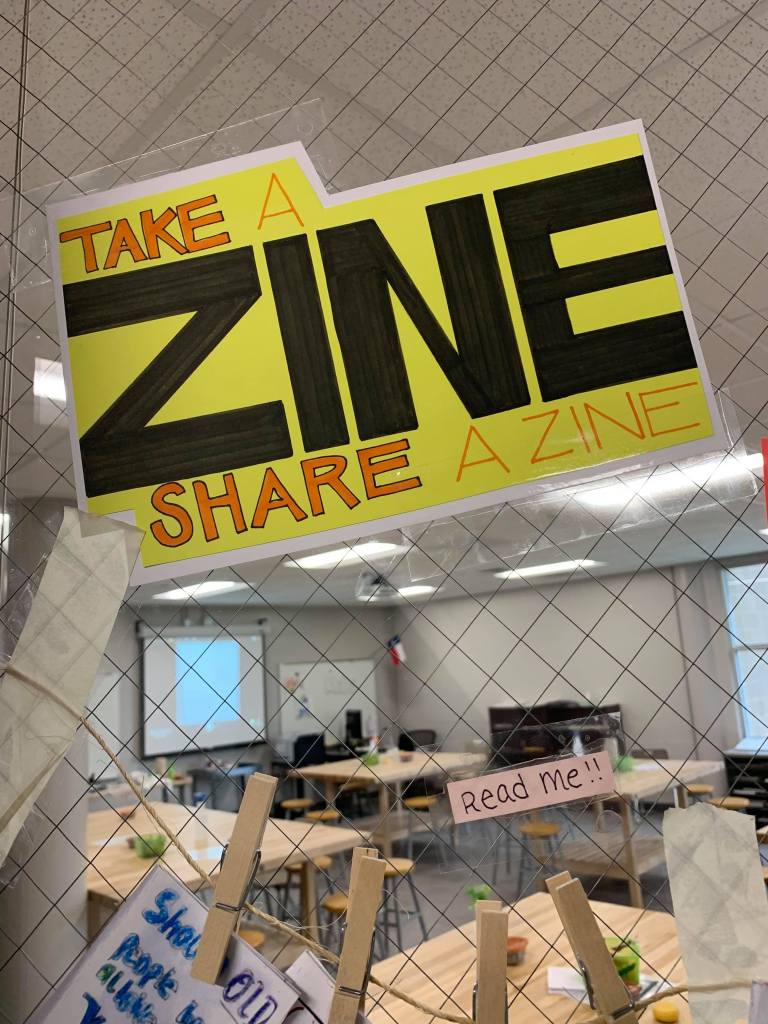
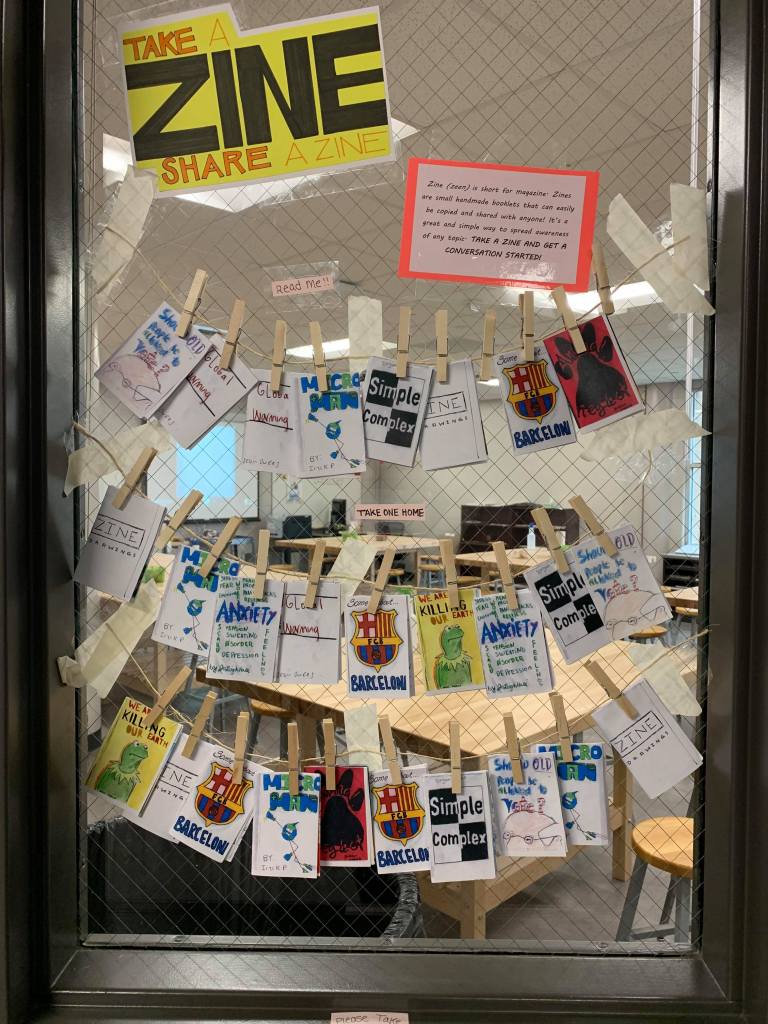
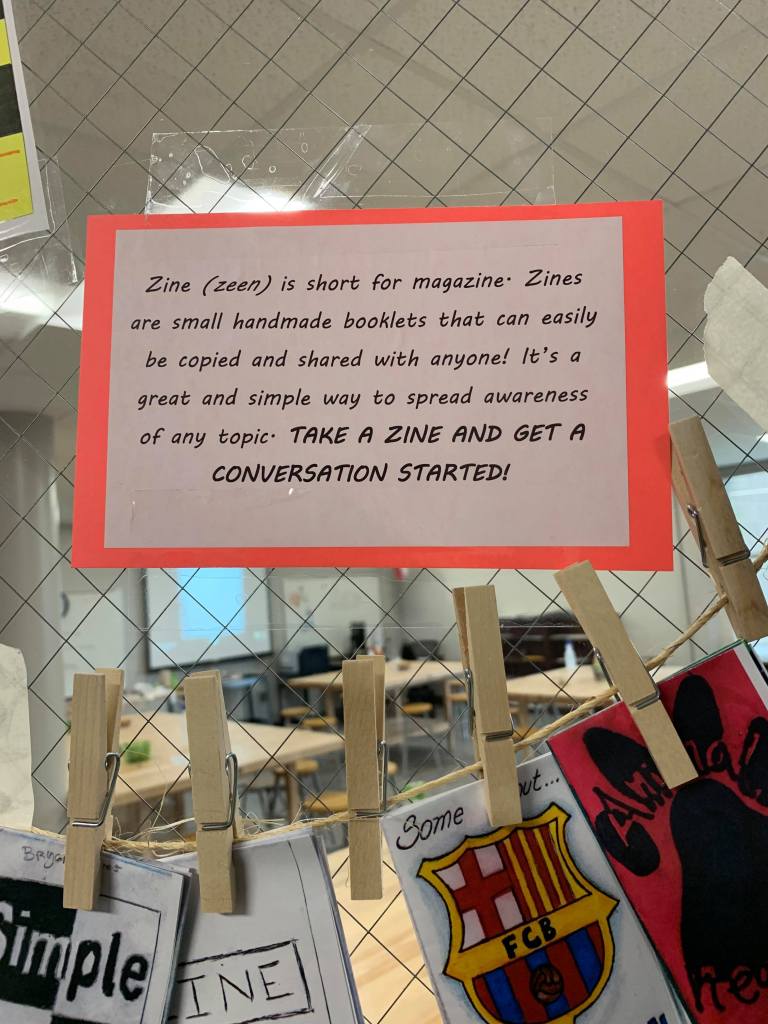
Zines (pronounced zeen) are small handmade booklets that cover any topic and can be easily photocopied and distributed. Your students can choose any topic or you can limit them. I had my students choose between 3 topics (How to, environmental awareness or culture/heritage). Below I have provided google slides, a printable handout of the project overview (thumbnails are on the back) and a grading rubric.
Besides introducing yourself (and going over a syllabus if you teach at the secondary level), what else are you going to do on the first few days of school? Look no further! I am the queen at first day(s) activities. Feel free to use or edit any ideas you see below.
Finish the Drawing: Musical Chairs Edition
Materials:
Paper
Pencil
Sharpie
Music/Playlist
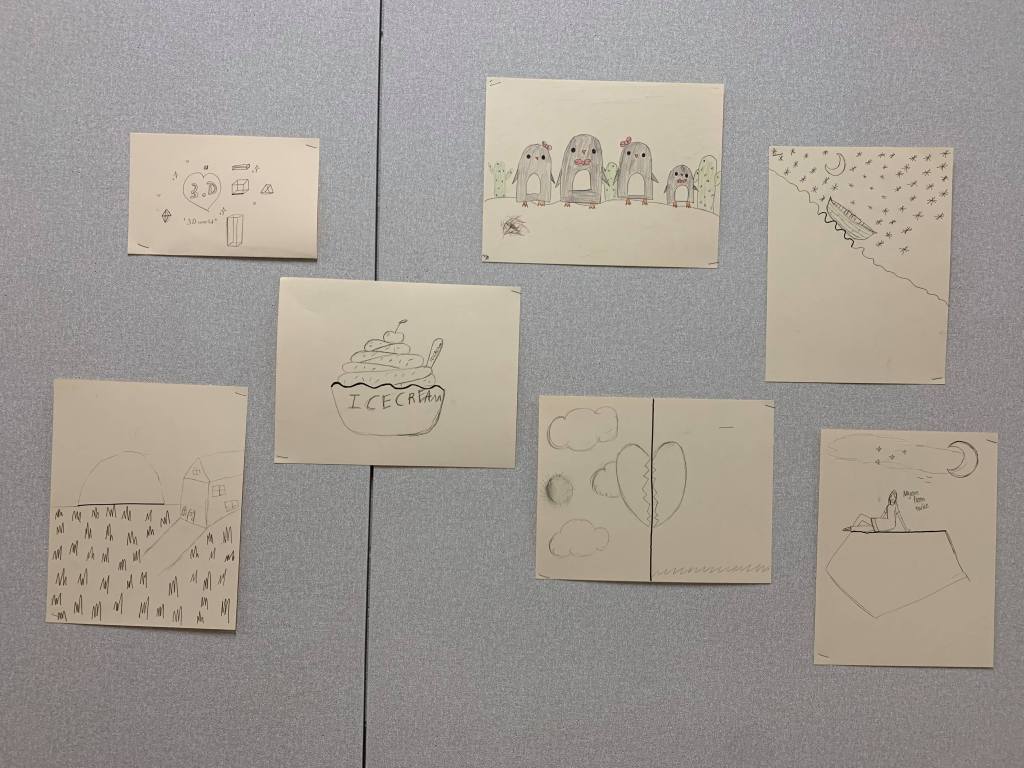
Instructions: Students are tasked with drawing a single line anywhere on their paper with a sharpie. This line can be long, short, wiggly, curly…the possibilities are endless. After the initial line is drawn, play music and instruct students to move/dance around the room. Once the music stops, they have to sit at the nearest drawing and continue adding to the initial line with a pencil. Give your kiddos about 2-3 minutes to add to the drawing. Repeat these steps as many times as you’d like. Have them eventually go back to their original seats to see how their line was transformed.
Most students took their drawings home but these were left behind.
The “Permanent Art” Game
Materials:
Paper OR Whiteboards
Marker OR Expo Markers
NO ERASERS!
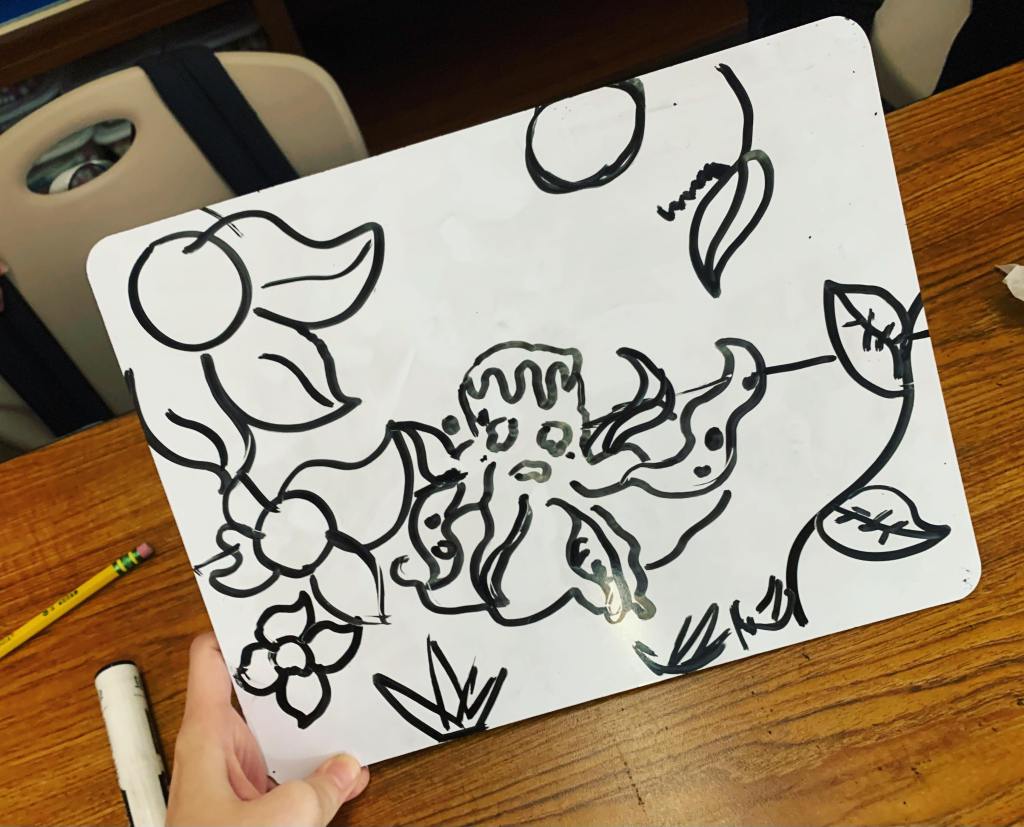
Instructions: This game can be played with markers and paper OR whiteboards and expo markers. If you decide to use whiteboards, be sure kids don’t cheat by wiping their mistakes away with their finger(s). I chose to use whiteboards to save paper (#SaveTheTrees). This game is inspired from a real game, Tattoo Stories. Give your students 3 VERY different prompts with varying difficulties. They have to try their best to create an image that incorporates all 3 prompts. They also only have 3 minutes to do so. If they cannot combine all 3 prompts, I encouraged them to at least combine 2. The trick is that they are not allowed to erase. This forces them to plan out their ideas and make purposeful marks. Yes they will complain about wanting to erase – you have been warned. Students were begging to do more prompts, it is quite an addictive game.
Their prompts for this drawing were: Octopus, melting and floral elements.
Get to Know You (Your Kids) Activity
As a student who grew up with social anxiety, speaking in front of the class was my literal nightmare. But this nightmare became a reality at the beginning of every school year. So I designed this activity, inspired from my child psychology professor, to have kids introduce themselves without having to talk. I suggest doing this activity outside to allow for maximum space.
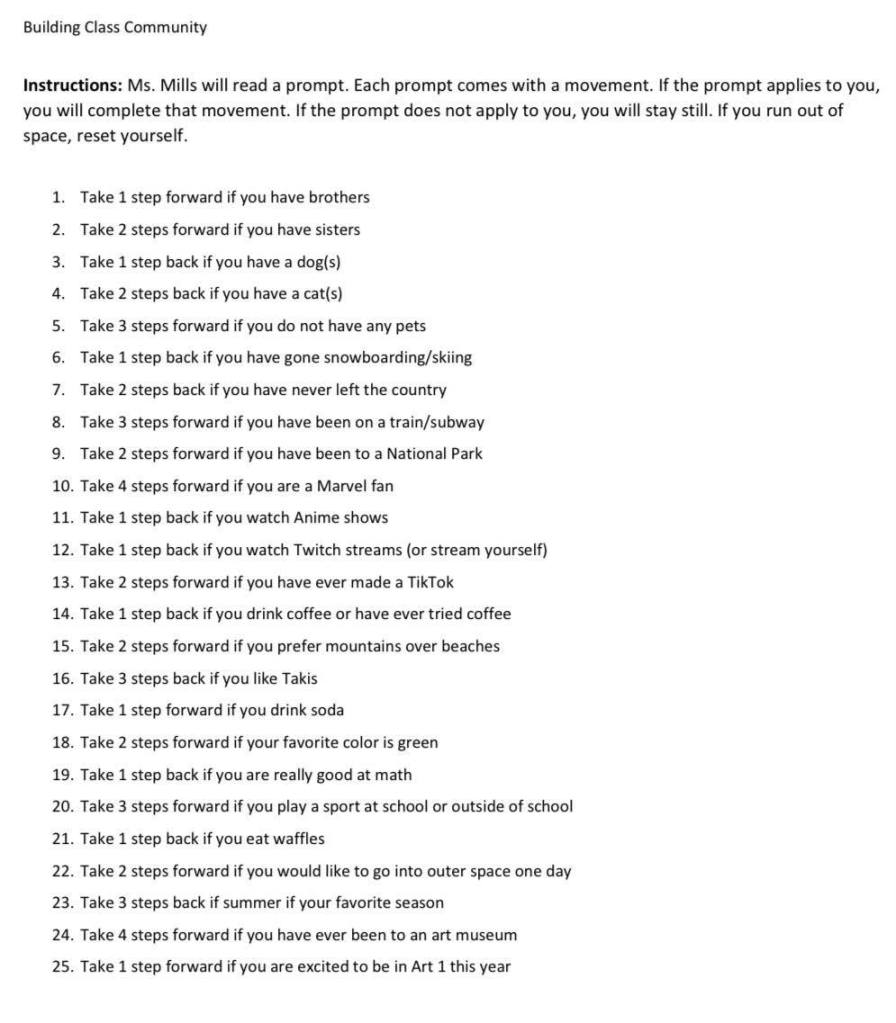
Instructions: Have students stand in a big circle. Stand in the middle to explain the rules…which are the following. “I (the teacher) will read a prompt out loud. Each prompt comes with a movement. If the prompt applies to you, you will complete that movement. If the prompt does not apply to you, you will stay still. If you run out of space, reset yourself.”
Feel free to use these same prompts or draft your own. The prompt possibilities are endless!
Get Motivated to Draw!
Materials:
Sticky notes
YouTube
Pencil
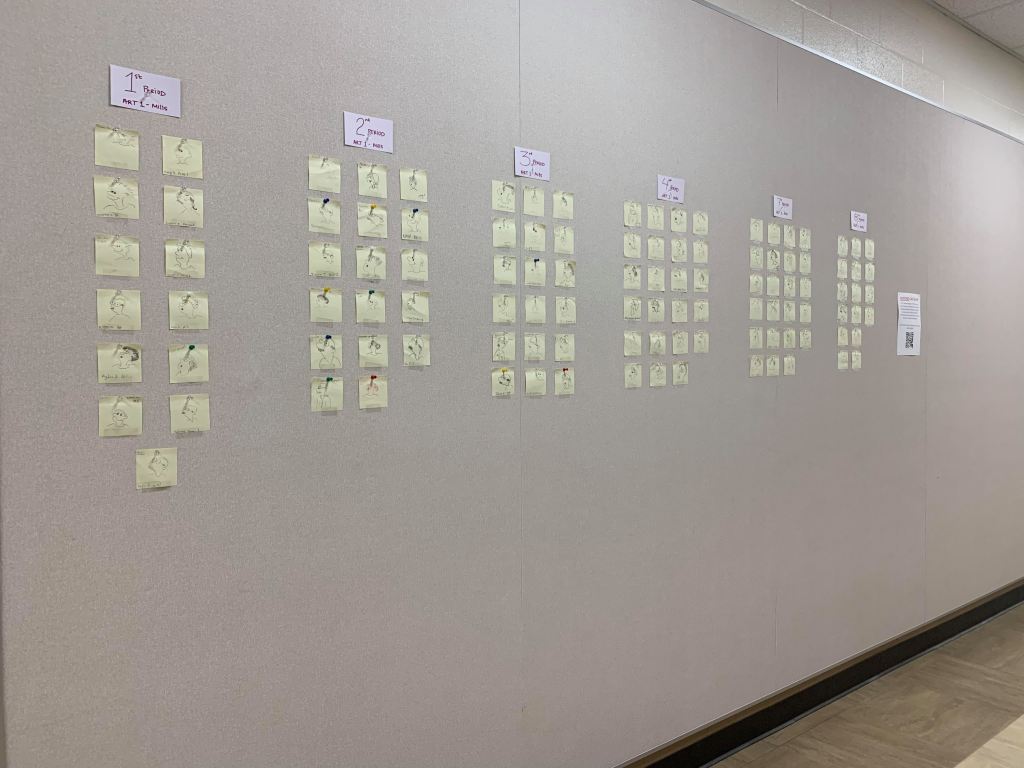
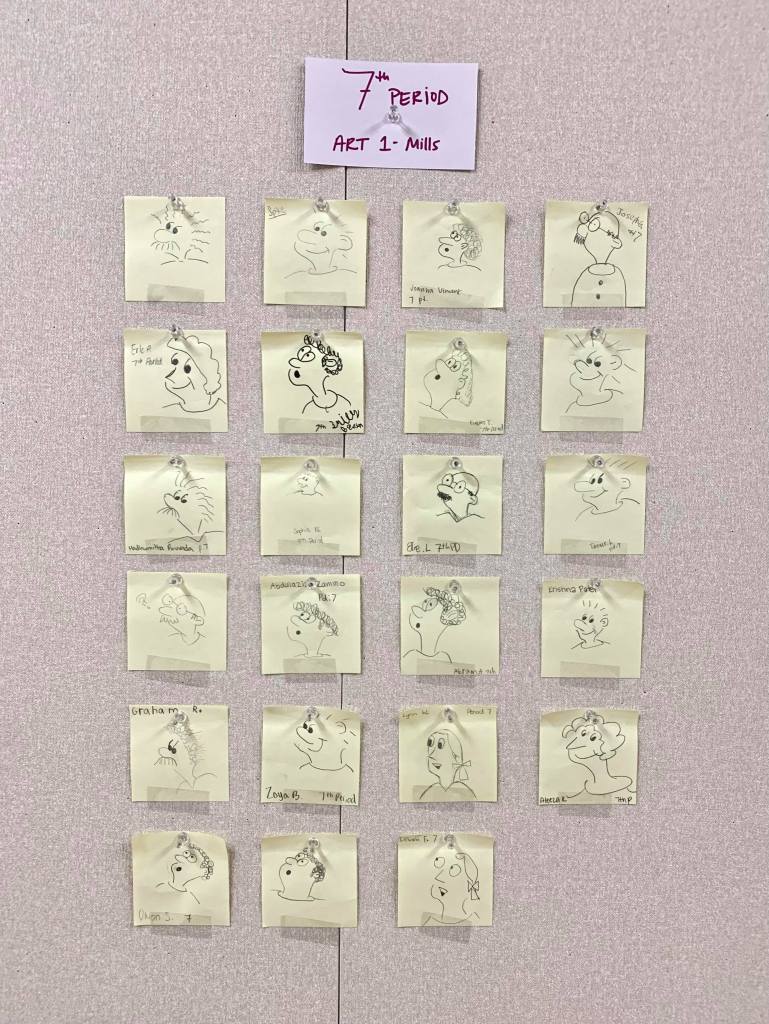
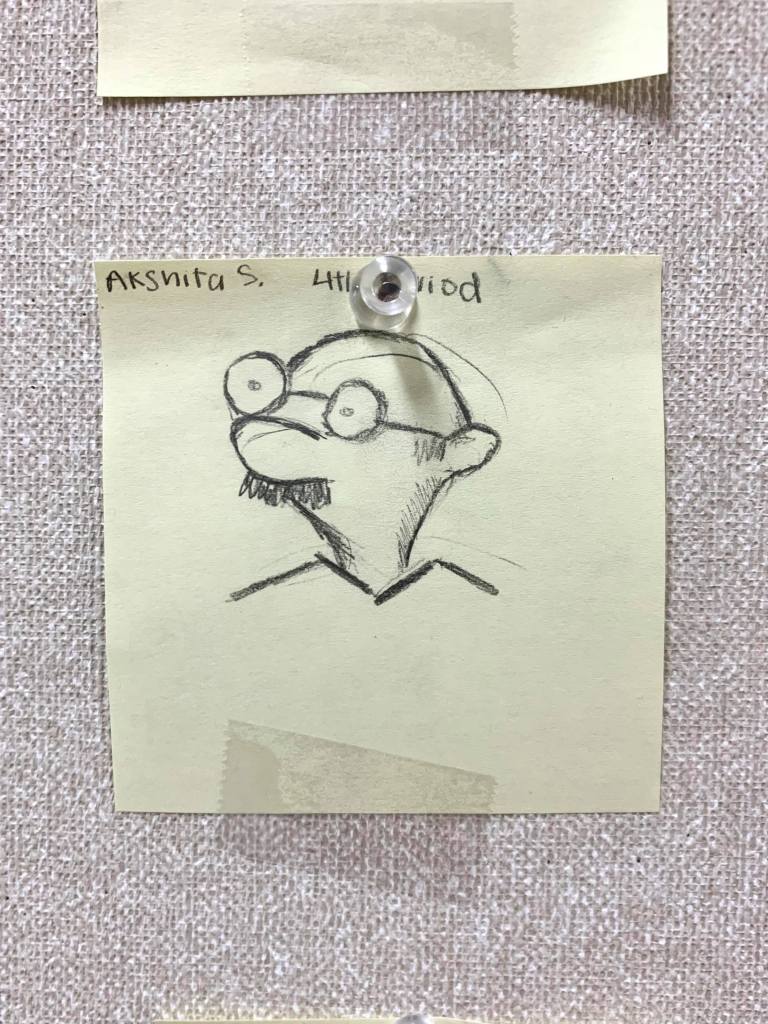
Instructions: Have your students watch the following TED Talk video. They should be instructed to draw along with the presenter – have them draw on sticky notes to save paper. At the end, ask them to choose their favorite sketch to display in the hallway. I cannot tell you how impactful this activity was! I still have kids drawing these little characters and they draw them on everything!!
Sticky note mural, students design a sticky note and place it in hallway.
Scavenger hunt, have students navigate your room to find essential supplies they might need on a daily basis. This will allow your students to get familiar with your room set-up.
Get to know you “coloring” sheet, you can find similar sheets on teacher pay teachers.
Why is art important?, have students respond/write their response to why they think art is important on a note card. Place best answers in the room for others to see/read.
Four corners, display 4 similar images up on the board/screen (example, Disney characters, foods, memes, etc.). Have the students move to that designated corner in the room that reflects them. Have them discuss with the other people in their corner, why they chose/relate to that image.
This or That, split the room into 2 sides and have students move to their answer (example, rainy days or sunny days?).
There are SO many things you can do on the first few days of school but if you are stuck, hopefully these ideas will help you out. Have a GREAT school year! 🙂
The beginning of each school year brings many things. Stress. Excitement. Confusion. Name any emotion and I’m sure it has probably run through your head at some point. I have decided to share my syllabus, my open house/parent night slides and 1st day of school slides as a way to help ease any anxiety about starting school. Feel free to get inspired by the slides and edit the syllabus. DISCLAIMER: My documents are geared towards Art 1 middle school students (typically 6th/7th grade).
This lesson of mine is a teacher FAV! I was bored of the traditional “Value Ice Cream” lesson you see all over Pinterest so I decided to spice it up.
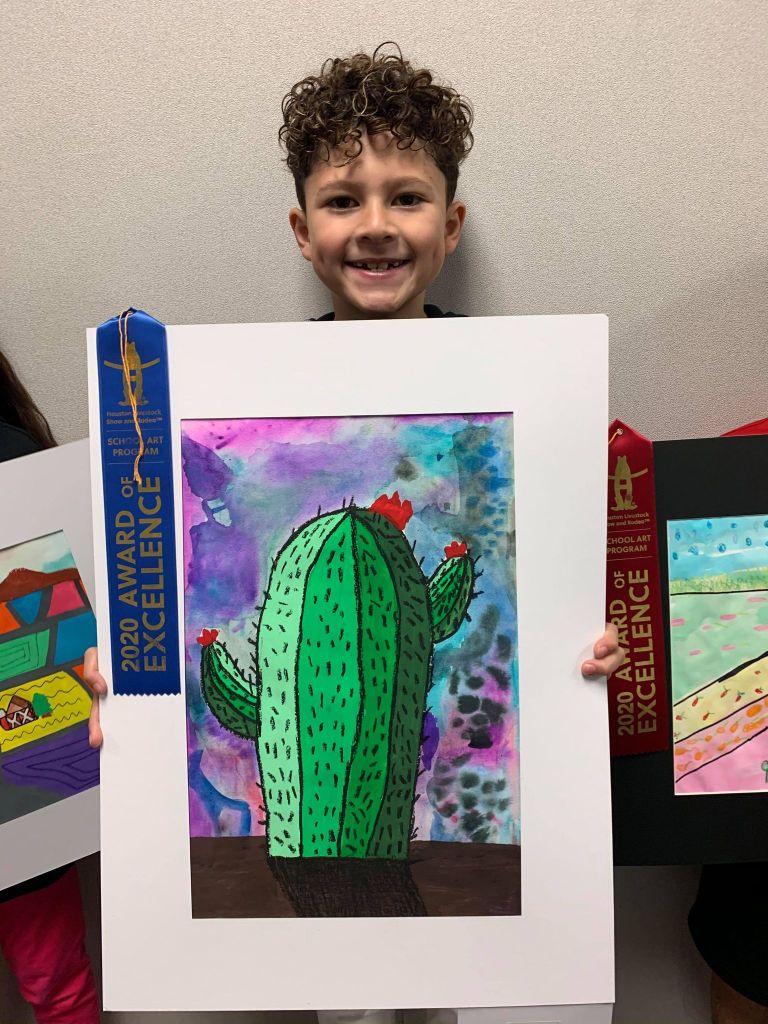
Proud of my 3rd grader for placing 1st with this lesson
I started off my lesson by showing them the classic “Value” song by Scratch Garden
WARNING: This song will get stuck in your head
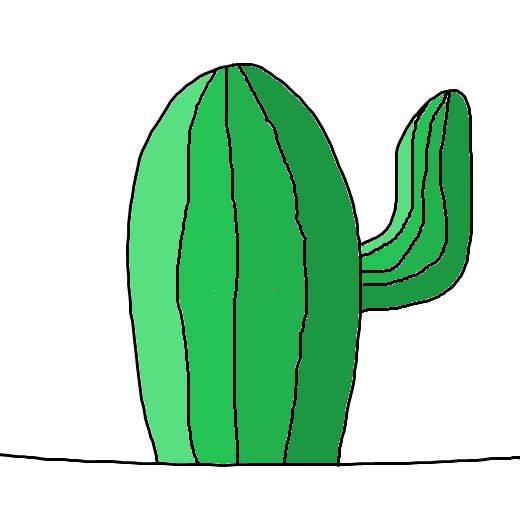
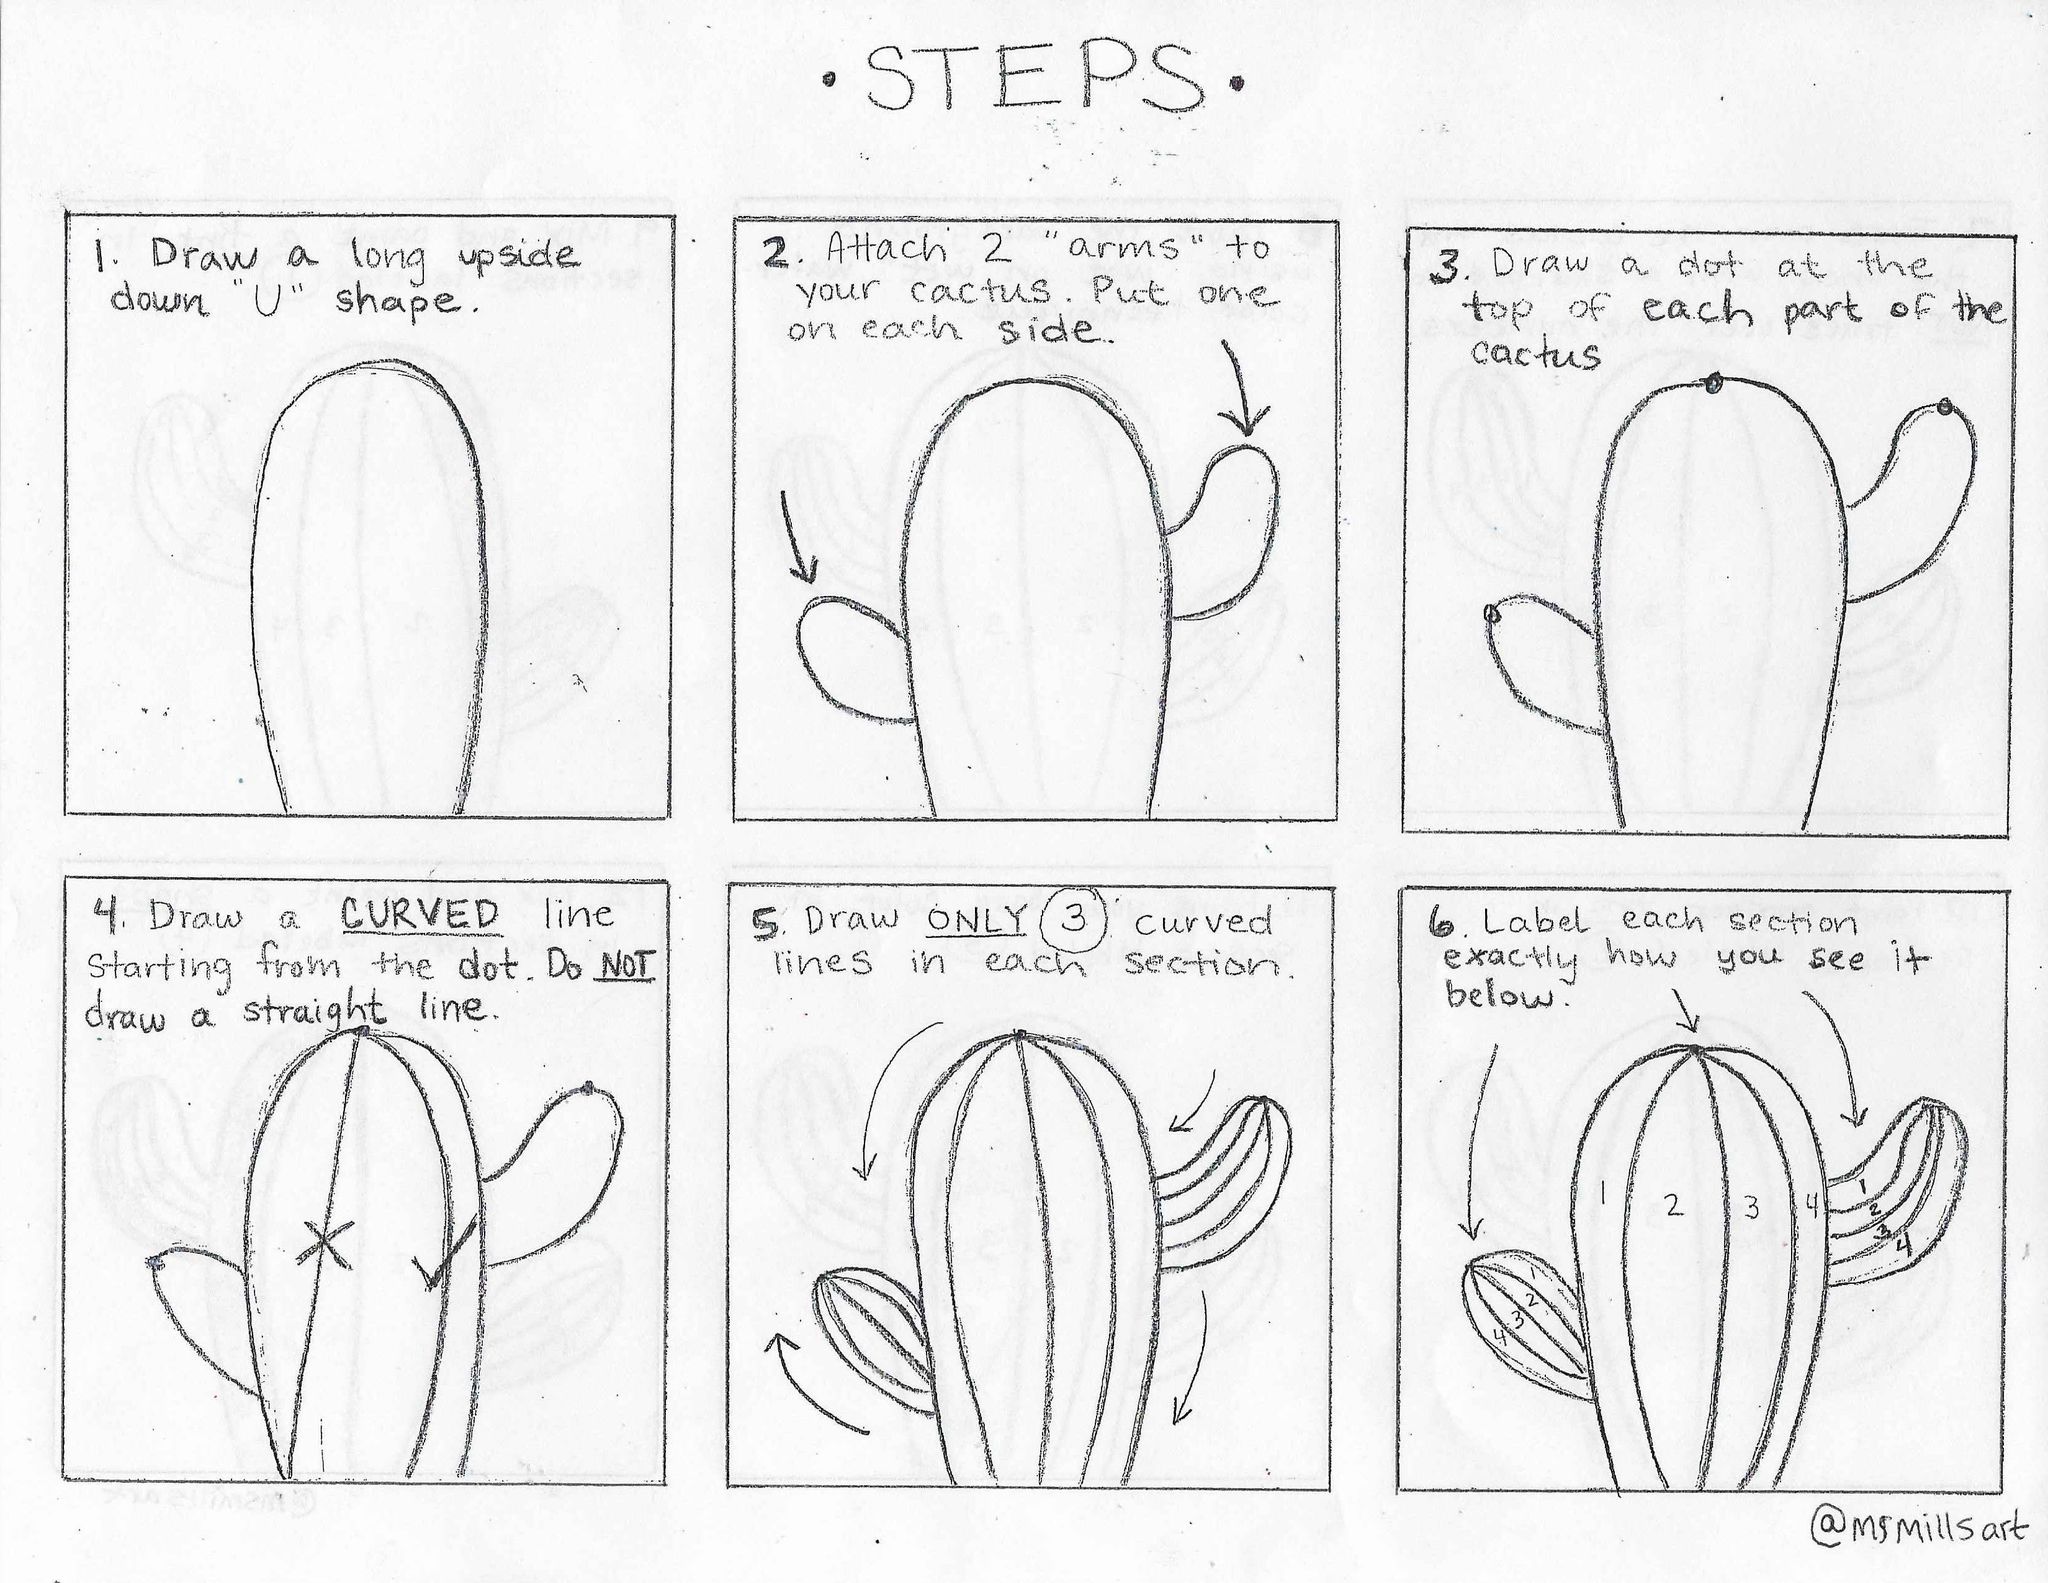
From there, I taught them how to draw a cactus (drawing the horizon line first is optional). In order for the lesson to work, each student will need to create 4 sections within their cactus. If they draw “arms” to their cactus, they too, will need 4 sections. No more. No less. Below is a quick sketch of how to label/ draw the cactus. TIP: Make sure their cactus body and arms aren’t too skinny. Have your students outline the cactus and it’s sections with a sharpie BUT DO NOT TRACE THE NUMBERS WITH A SHARPIE!
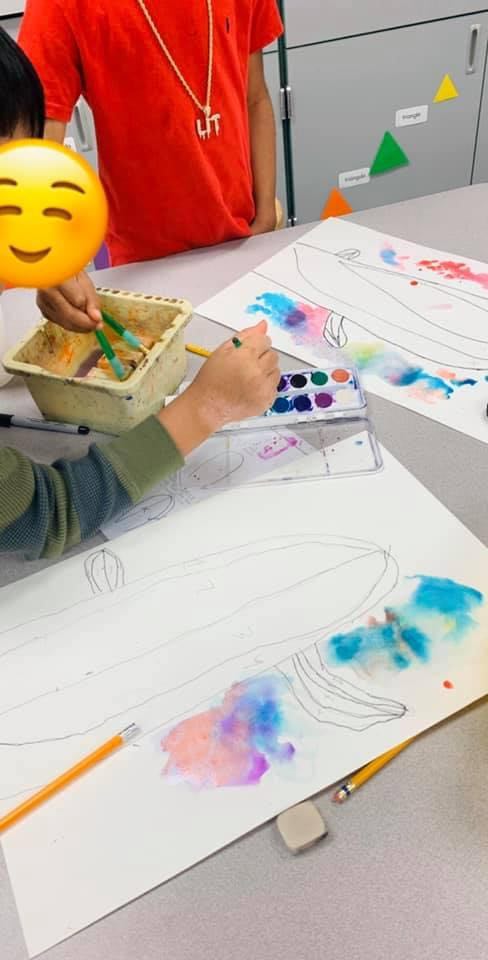
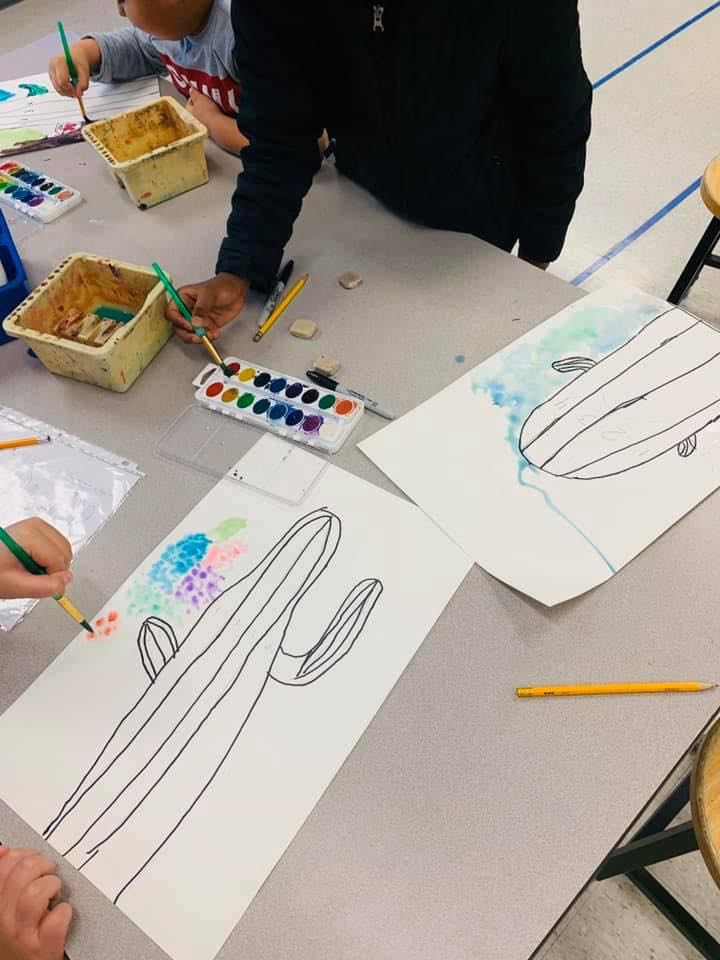
The background can be done however you’d like! I chose to introduce my kids to wet-on-wet watercolor technique for the background. You could use tempera cakes, acrylic or oil pastels as watercolor alternatives. You could also tie in warm/cool colors for the background as well. The possibilities are ENDLESS!
They loved watching the watercolor spread. Many “oohs” and “ahhs” that day!
My classes are 50mins long so the drawing, tracing and watercolor background took 1 class period. However, most students didn’t finish painting their background on the first day.
On the second day, students added color inside sections 1 and 3. In sections labeled 1, students added the following paint formula: white + white + green. In sections labeled 3, students painted them green (two coats where applied in this section because our paint was thin). I only let them add paint inside two sections at a time because I knew my kids would get confused if we tried to paint all the sections on one day. It also allowed time to dry before painting in neighboring sections.
If students finished in lightning speed I either asked them to add more color to their background or they got to free draw on a whiteboard (my kids free draw on whiteboards to save on paper).
On the third day, students added color inside sections 2 and 4. In sections labeled 2, students added the following paint formula: white + green. In sections labeled 4, students added the following paint formula: brown + green. Now, I know that a shade is when you add black to a color however, black over powered the green no matter how little I added. I made sure to pre-mix the paint for section 4 before handing it to them, that way they would not think brown plus any color makes a shade. I passed out paint in plastic food containers (with lids) and on each lid, I labeled it 1-4, depending on which section it was for.
On the same day, students painted the ground. The ground was the following paint formula: white + black + brown (tone). They also had the option of painting a red/pink flower on top of the cactus before placing their art on the drying rack.
Color variation may vary based on paint ratio and pigmentation
On the last day, we added a drop shadow, outlined each section and drew the prickly texture with a black oil pastel. I highly encourage you, the teacher, to spray your students’ artwork with a fixative before letting them take it home. This will prevent the black oil pastel from rubbing off and messing up anything in their backpack, car or home.
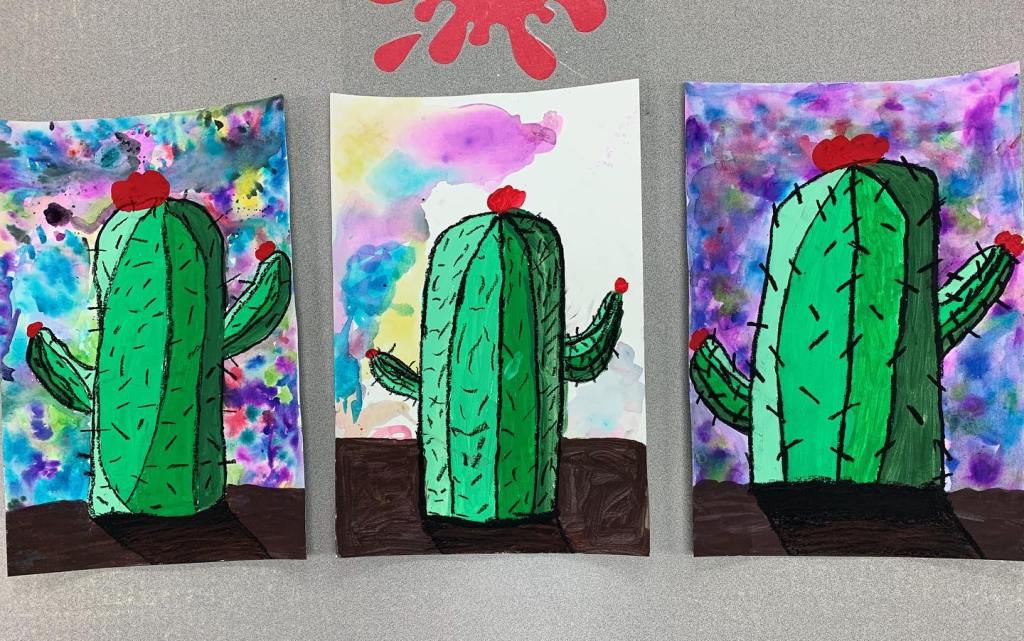
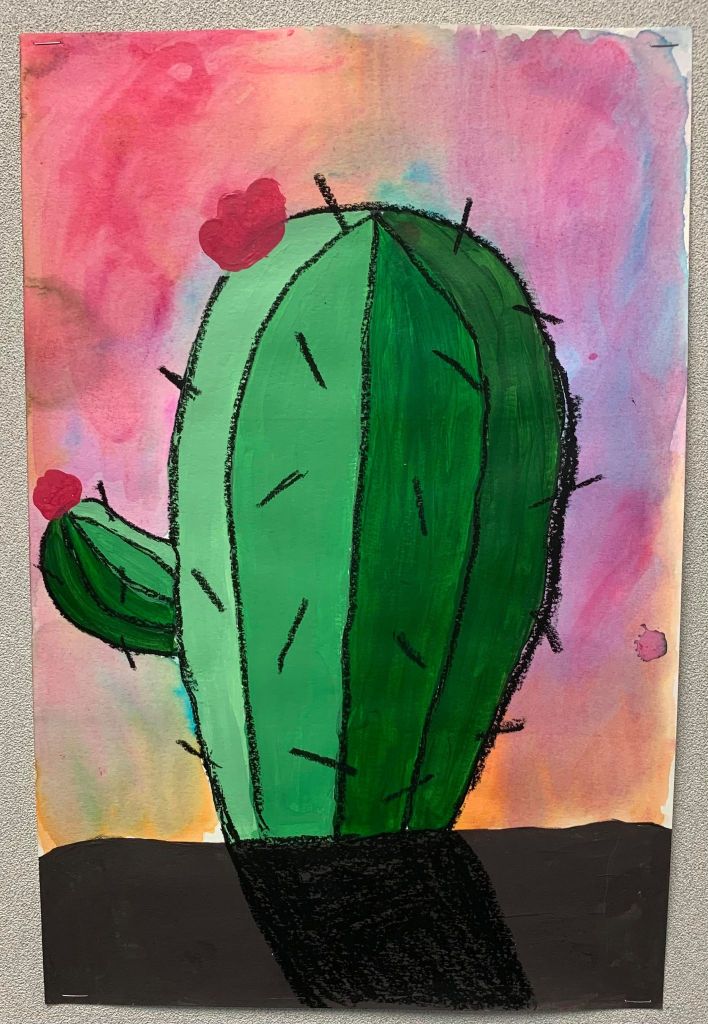
Below are student examples
I love the variety of cactus sizes and backgrounds of each piece
Click below to access printable handouts with each step. I drew up and made copies of this handout to have on each table while the students worked.
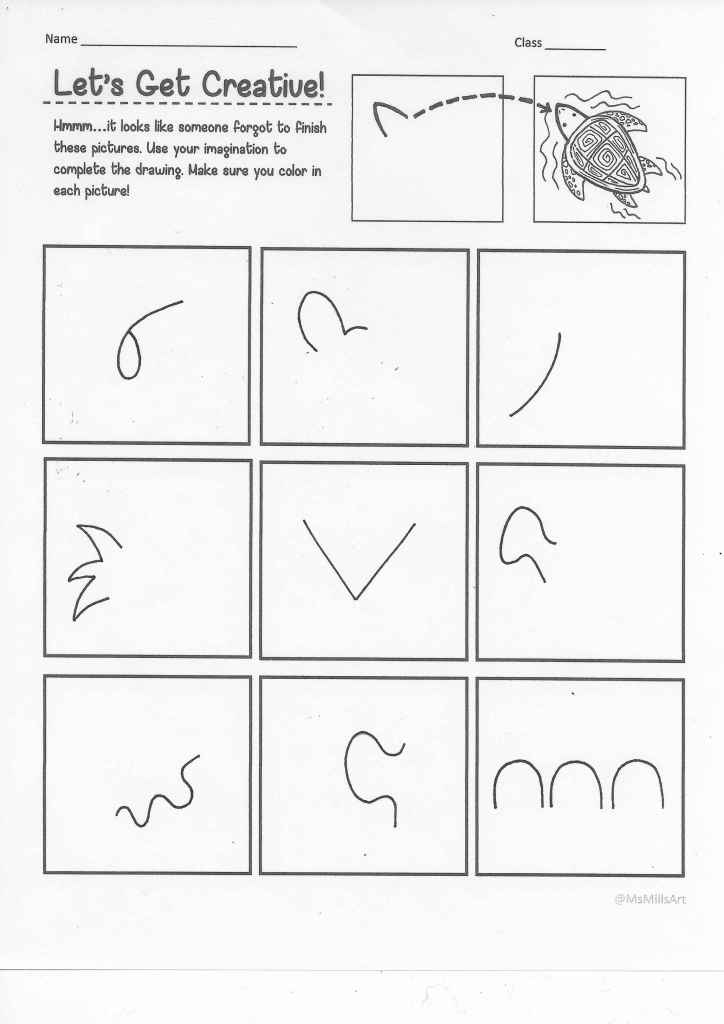
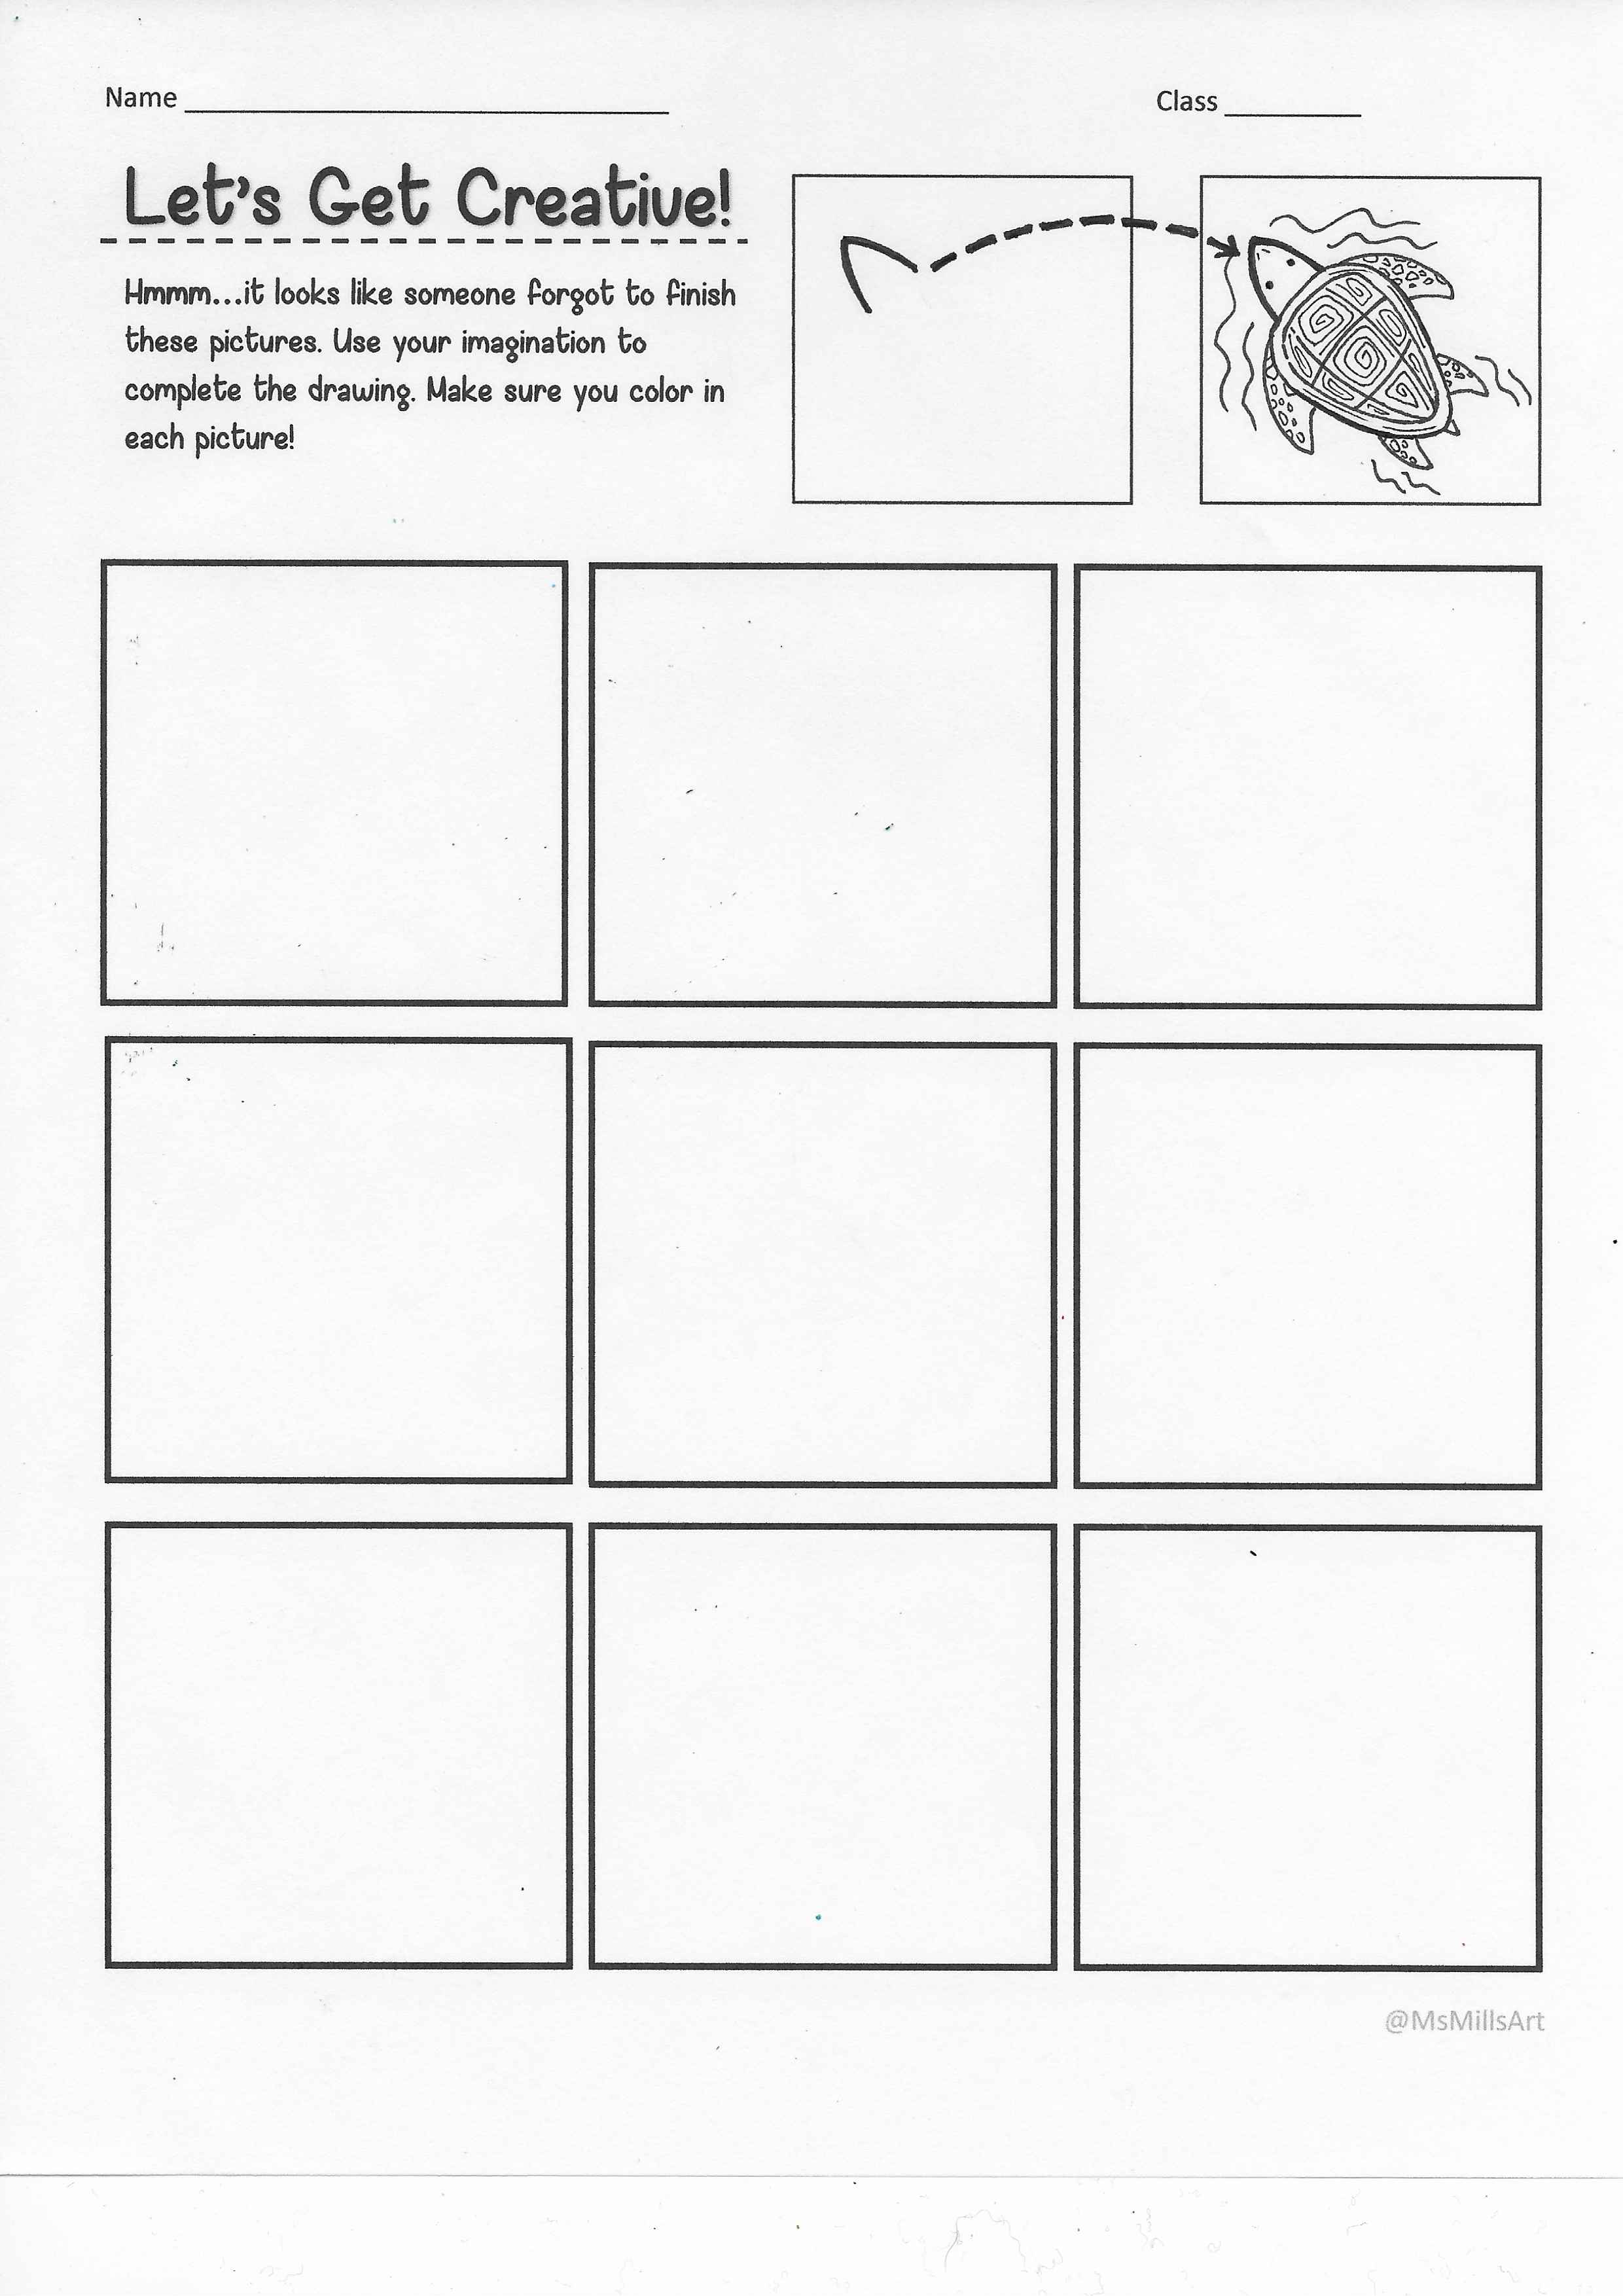
This FREE handout is a great activity for warm-ups or even early finishers. This handout was inspired by the book Beautiful Oops! by Barney Saltzberg.
Here is the BLANK version. This is a good option for teachers who want to draw their own random lines. You could also ask students to create their own lines and then pass it along for someone else to complete.
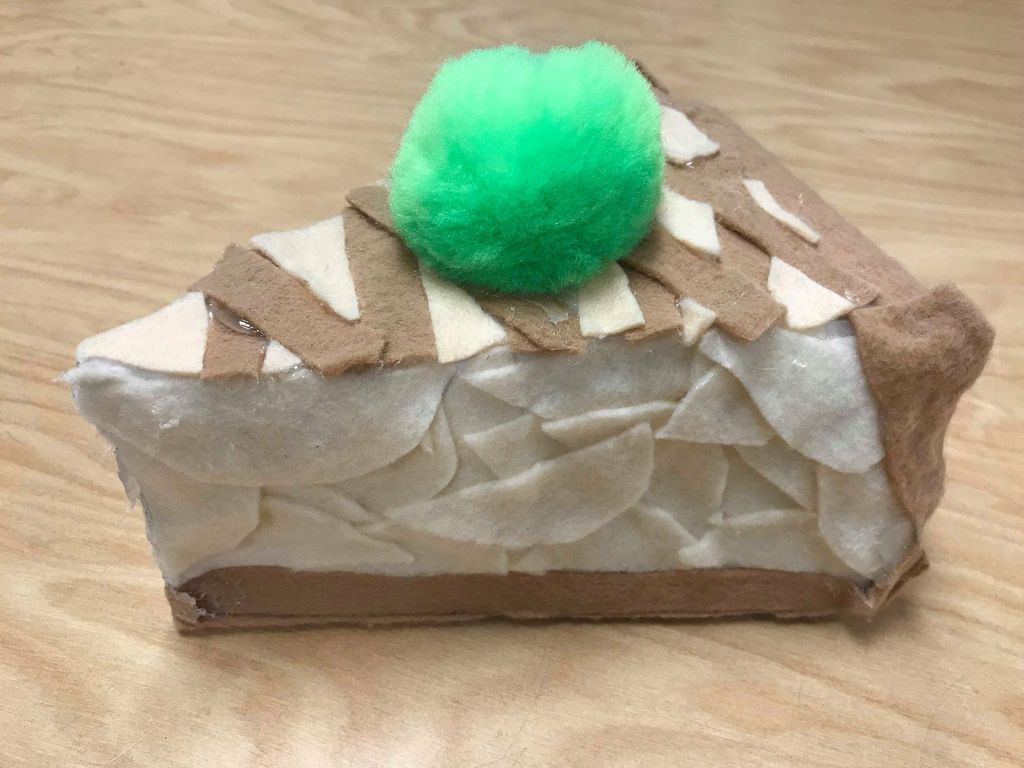
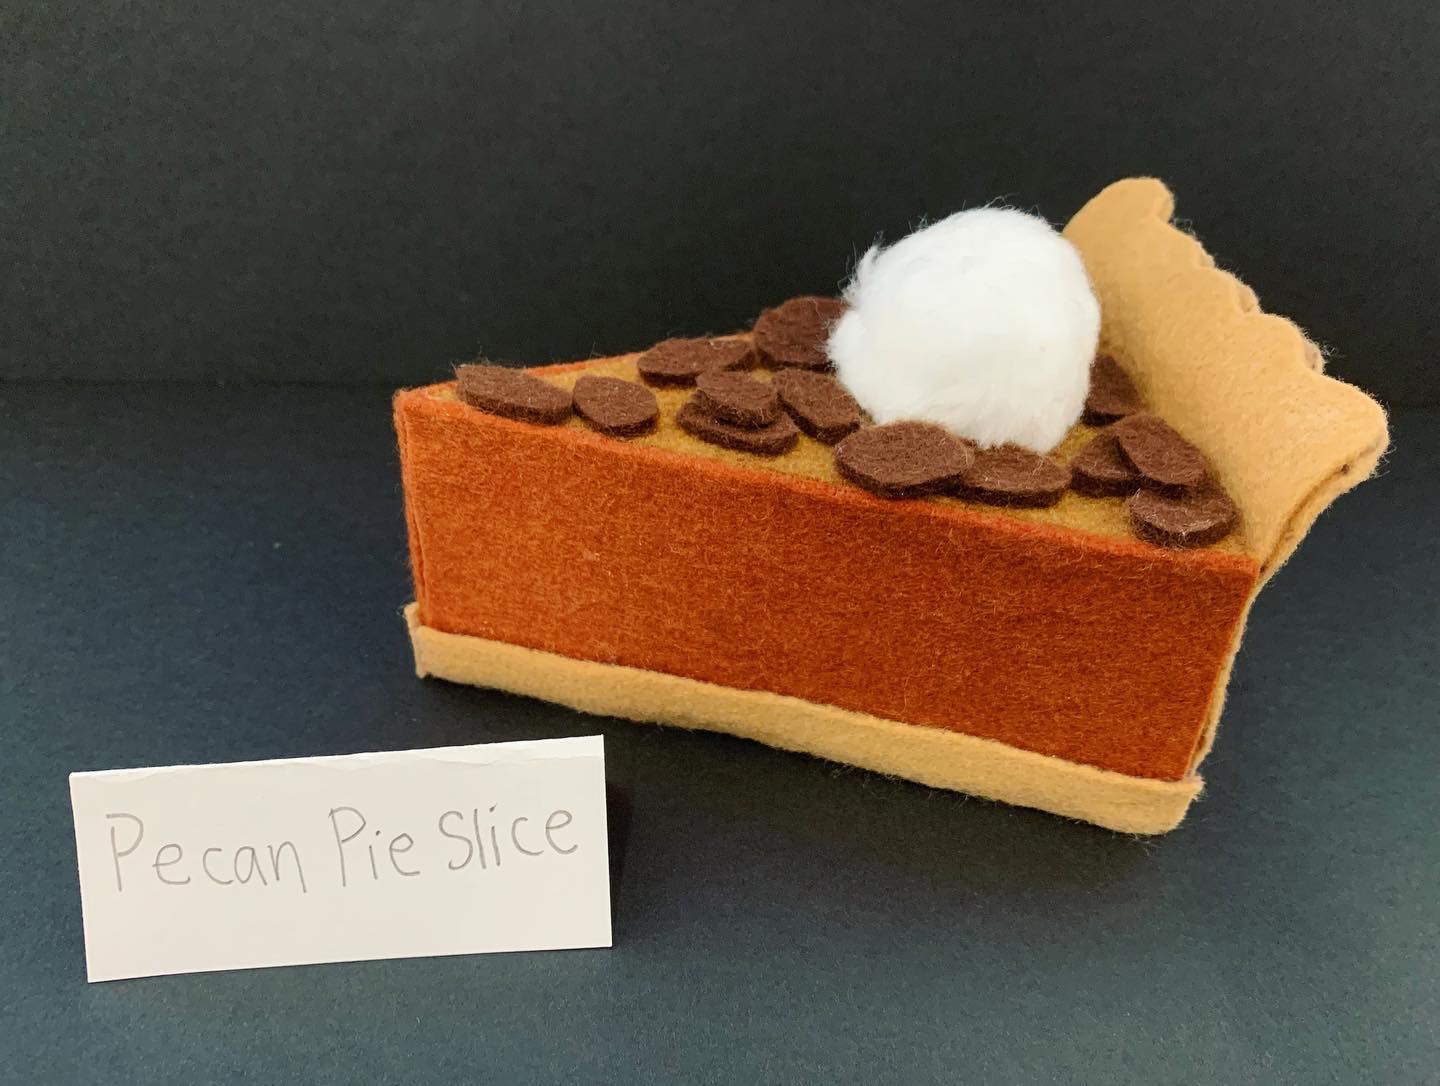
Many teachers have done Claes Oldenburg inspired food sculptures so by no means do I claim this to be an original idea. I just wanted to share the resources, tips and steps I used/made to execute these delicious projects.
Here is a Google Slide that introduces Oldenburg, in-the-round, pop art and soft sculptures. There is also a video link.
Students will decide what food item they would like to create out of card stock and felt. TIP: If working with younger students, require all students to make the same food item. This will help YOU (the teacher) greatly!
Students will create a foundation/structure for their food using card stock paper, scissors and glue. This step can be tricky because it requires an engineering mindset. ADVICE: teach students how to make tabs. This will help later when they have to glue everything together.
Here is a FREE printable of a cake template. Print on card stock! You could also show this template as an example for your students if you are requiring them to design their own template.
3. Once they have their pieces cut out, they’ll add glue onto the tabs and attach the pieces directly to the tabs. Glue should ONLY go on the tabs. TIP: If you plan on stuffing your structure with newspaper, leave one side unglued. Insert newspaper (or whatever desired stuffing) into the open side and fill up until full. Glue on last side when all the stuffing has been placed inside the structure.
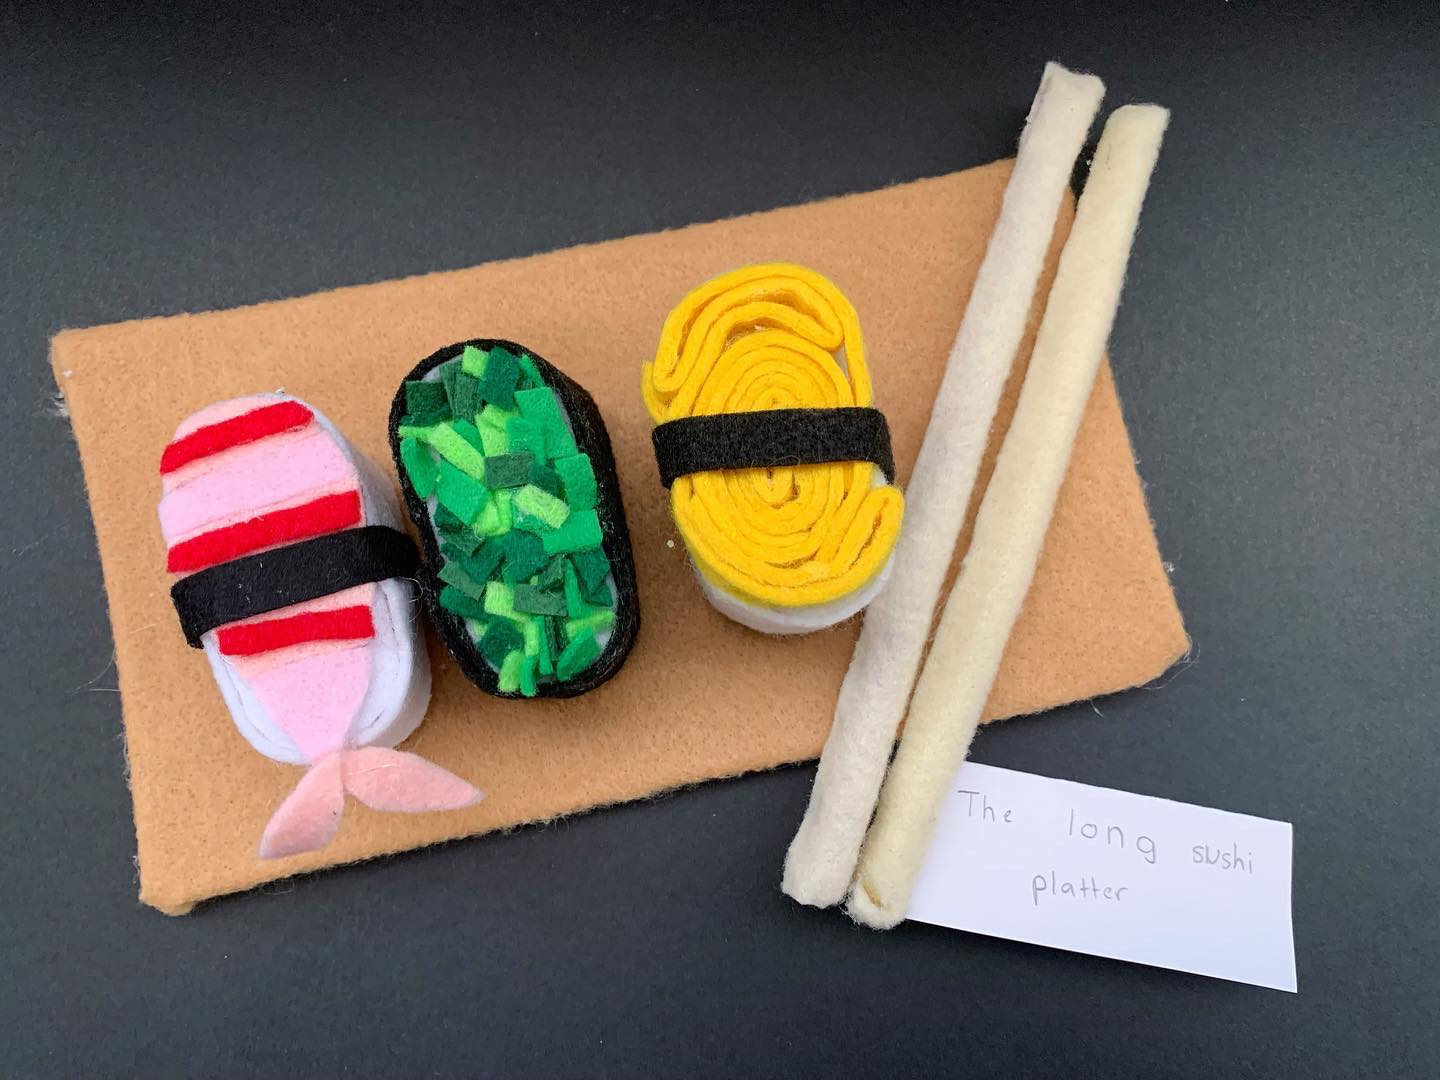
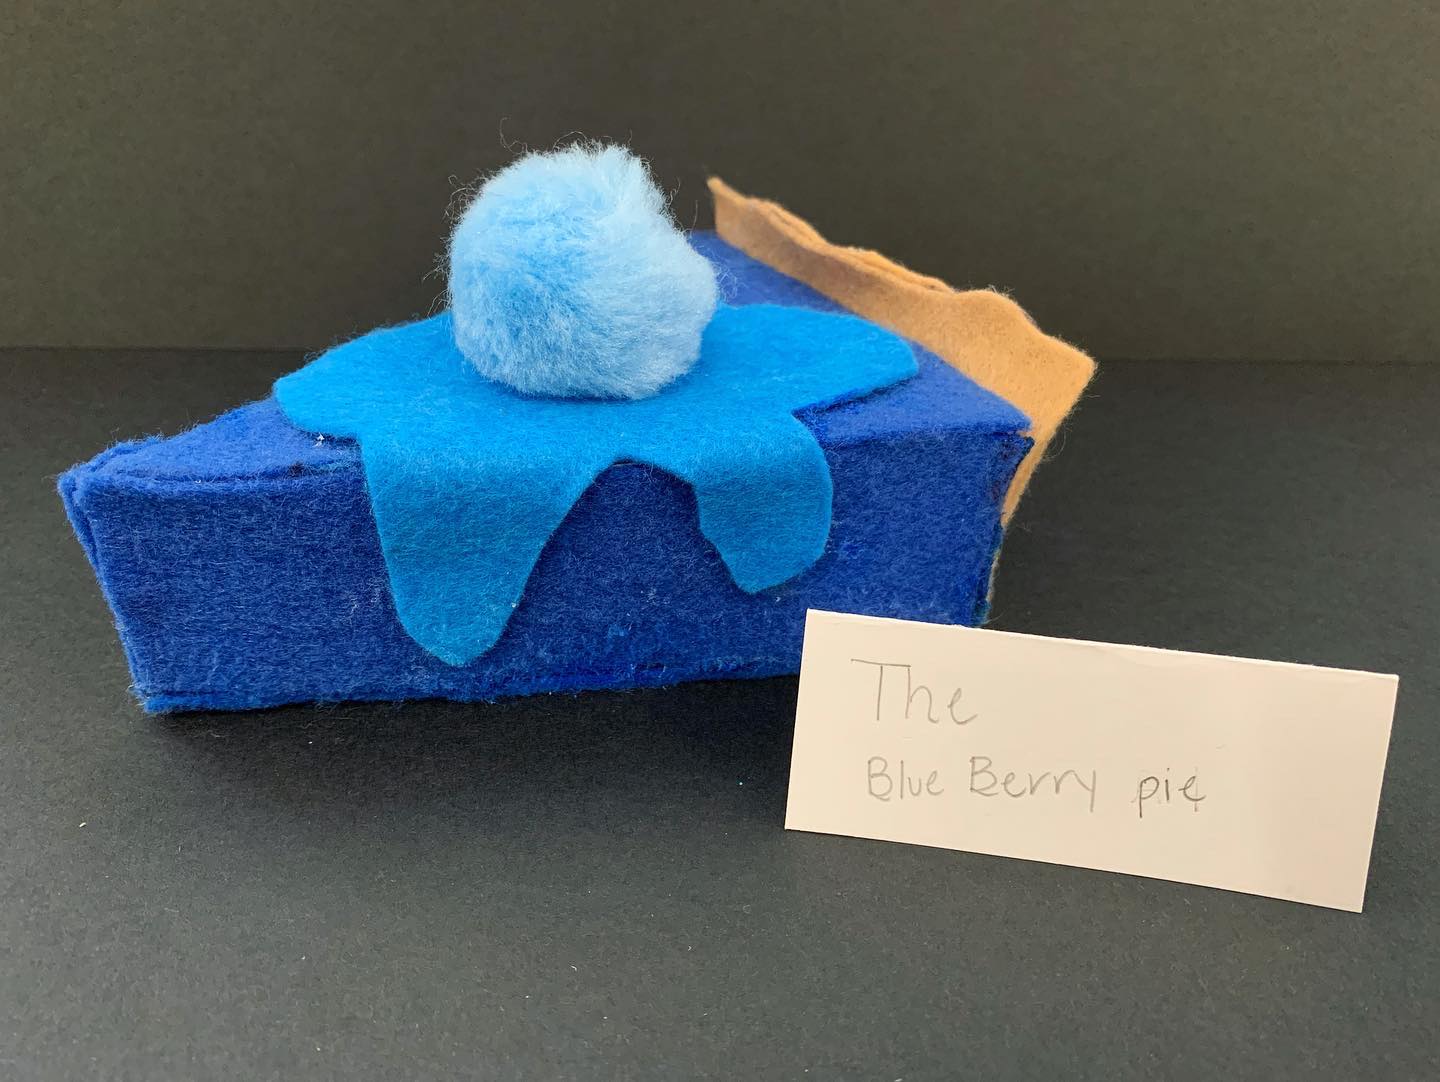
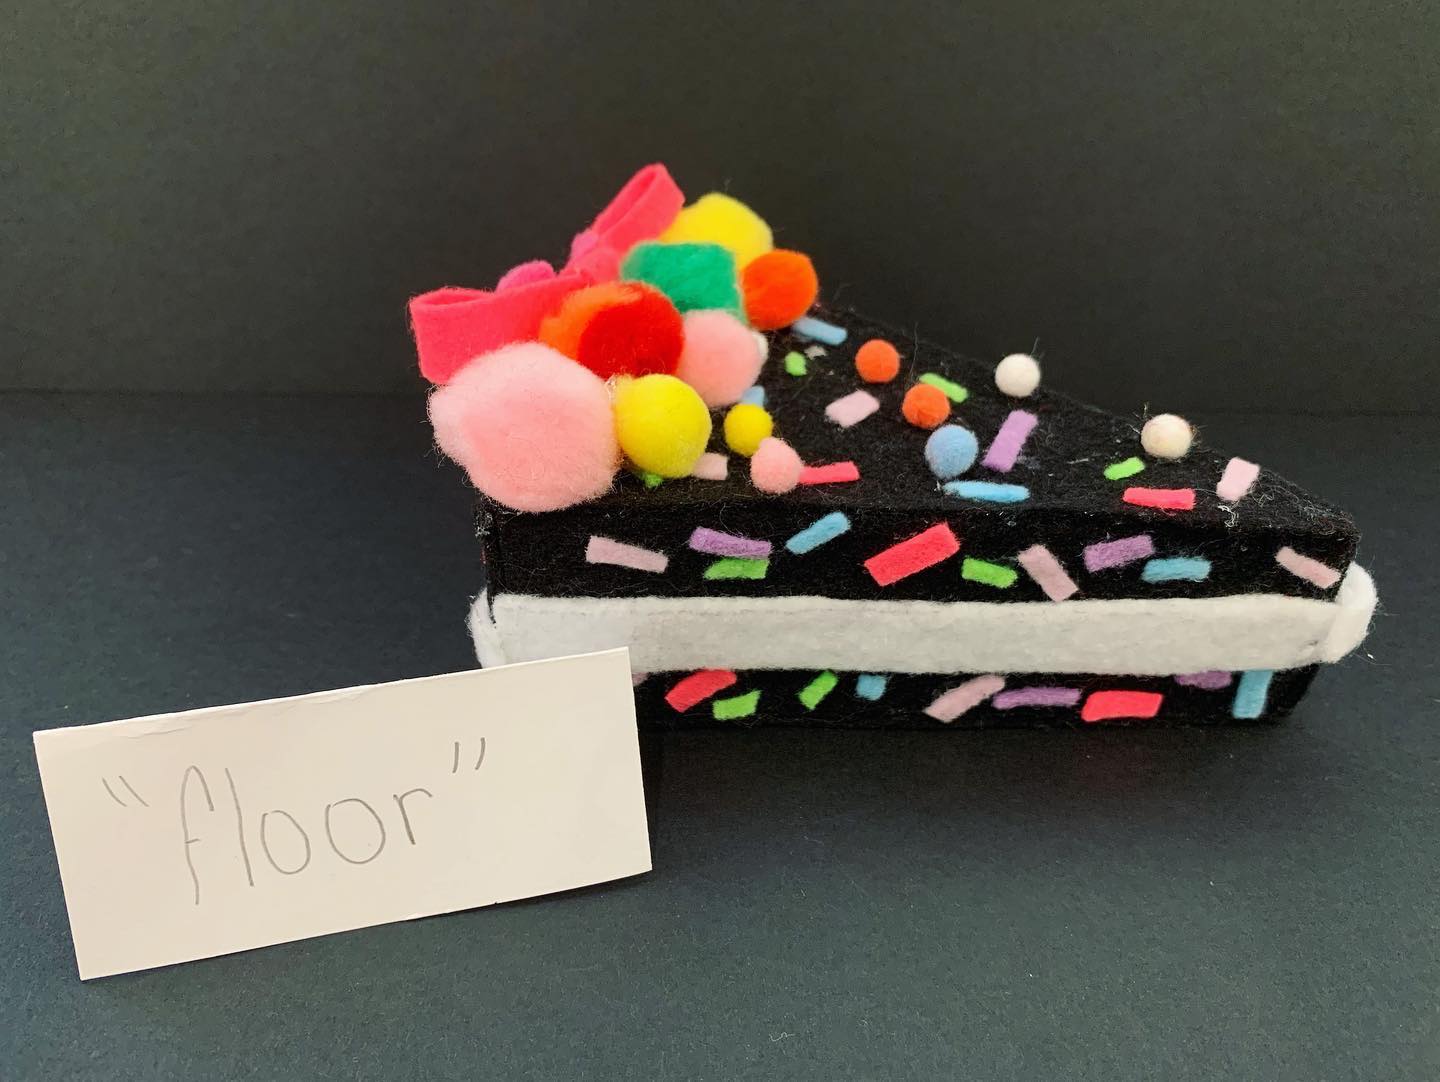
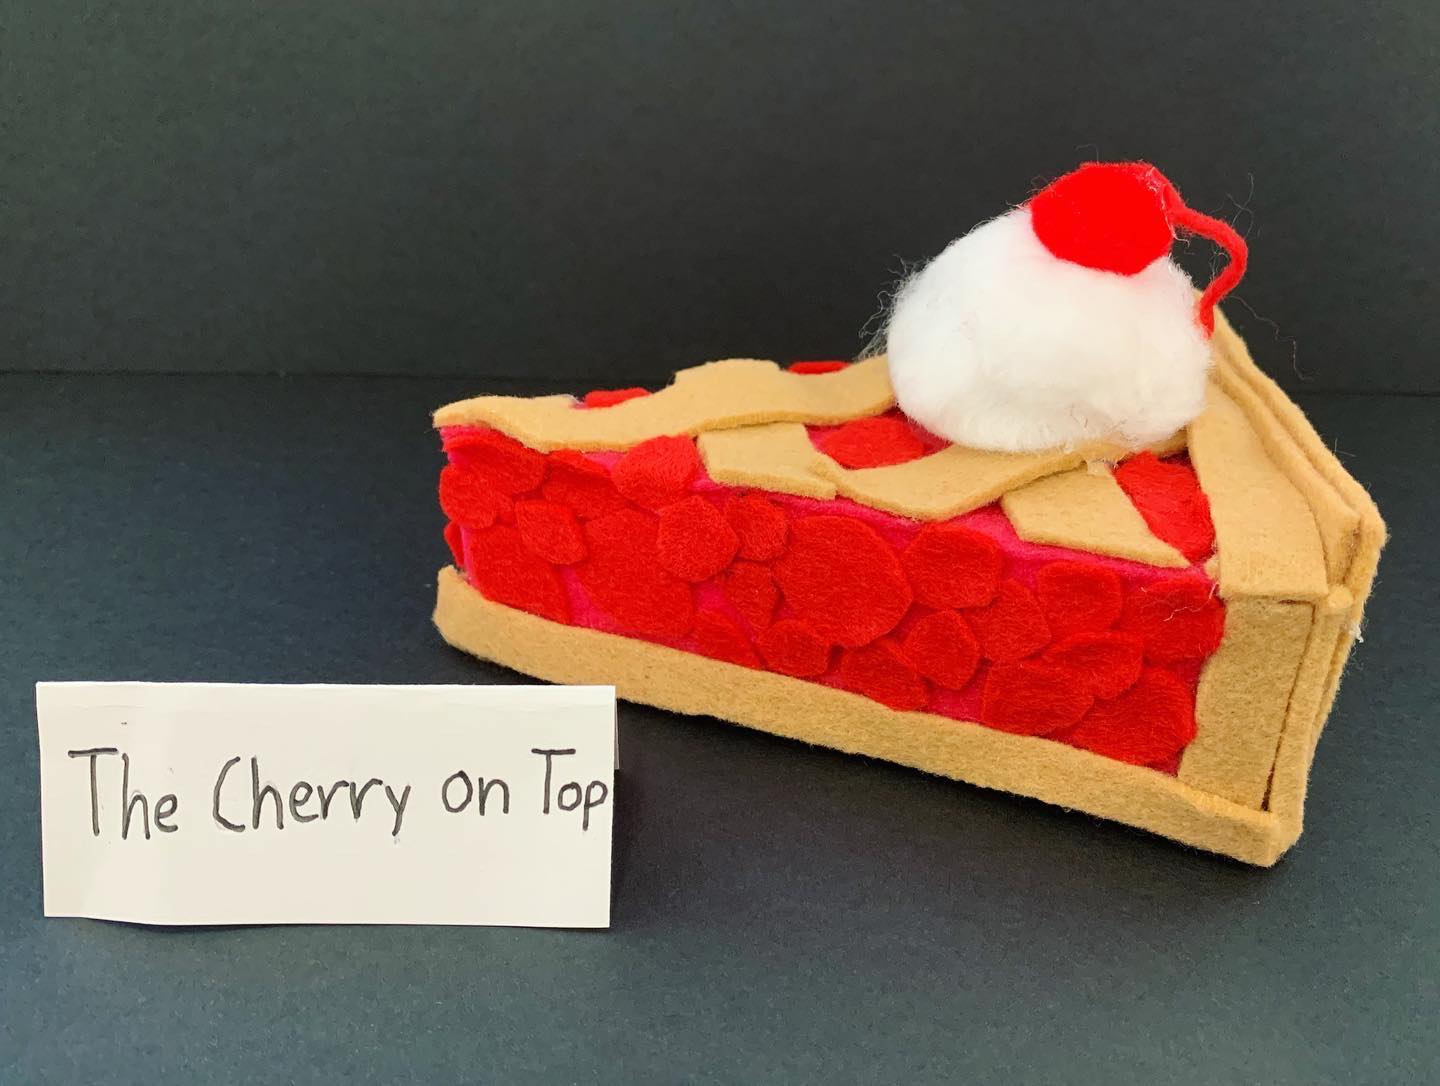
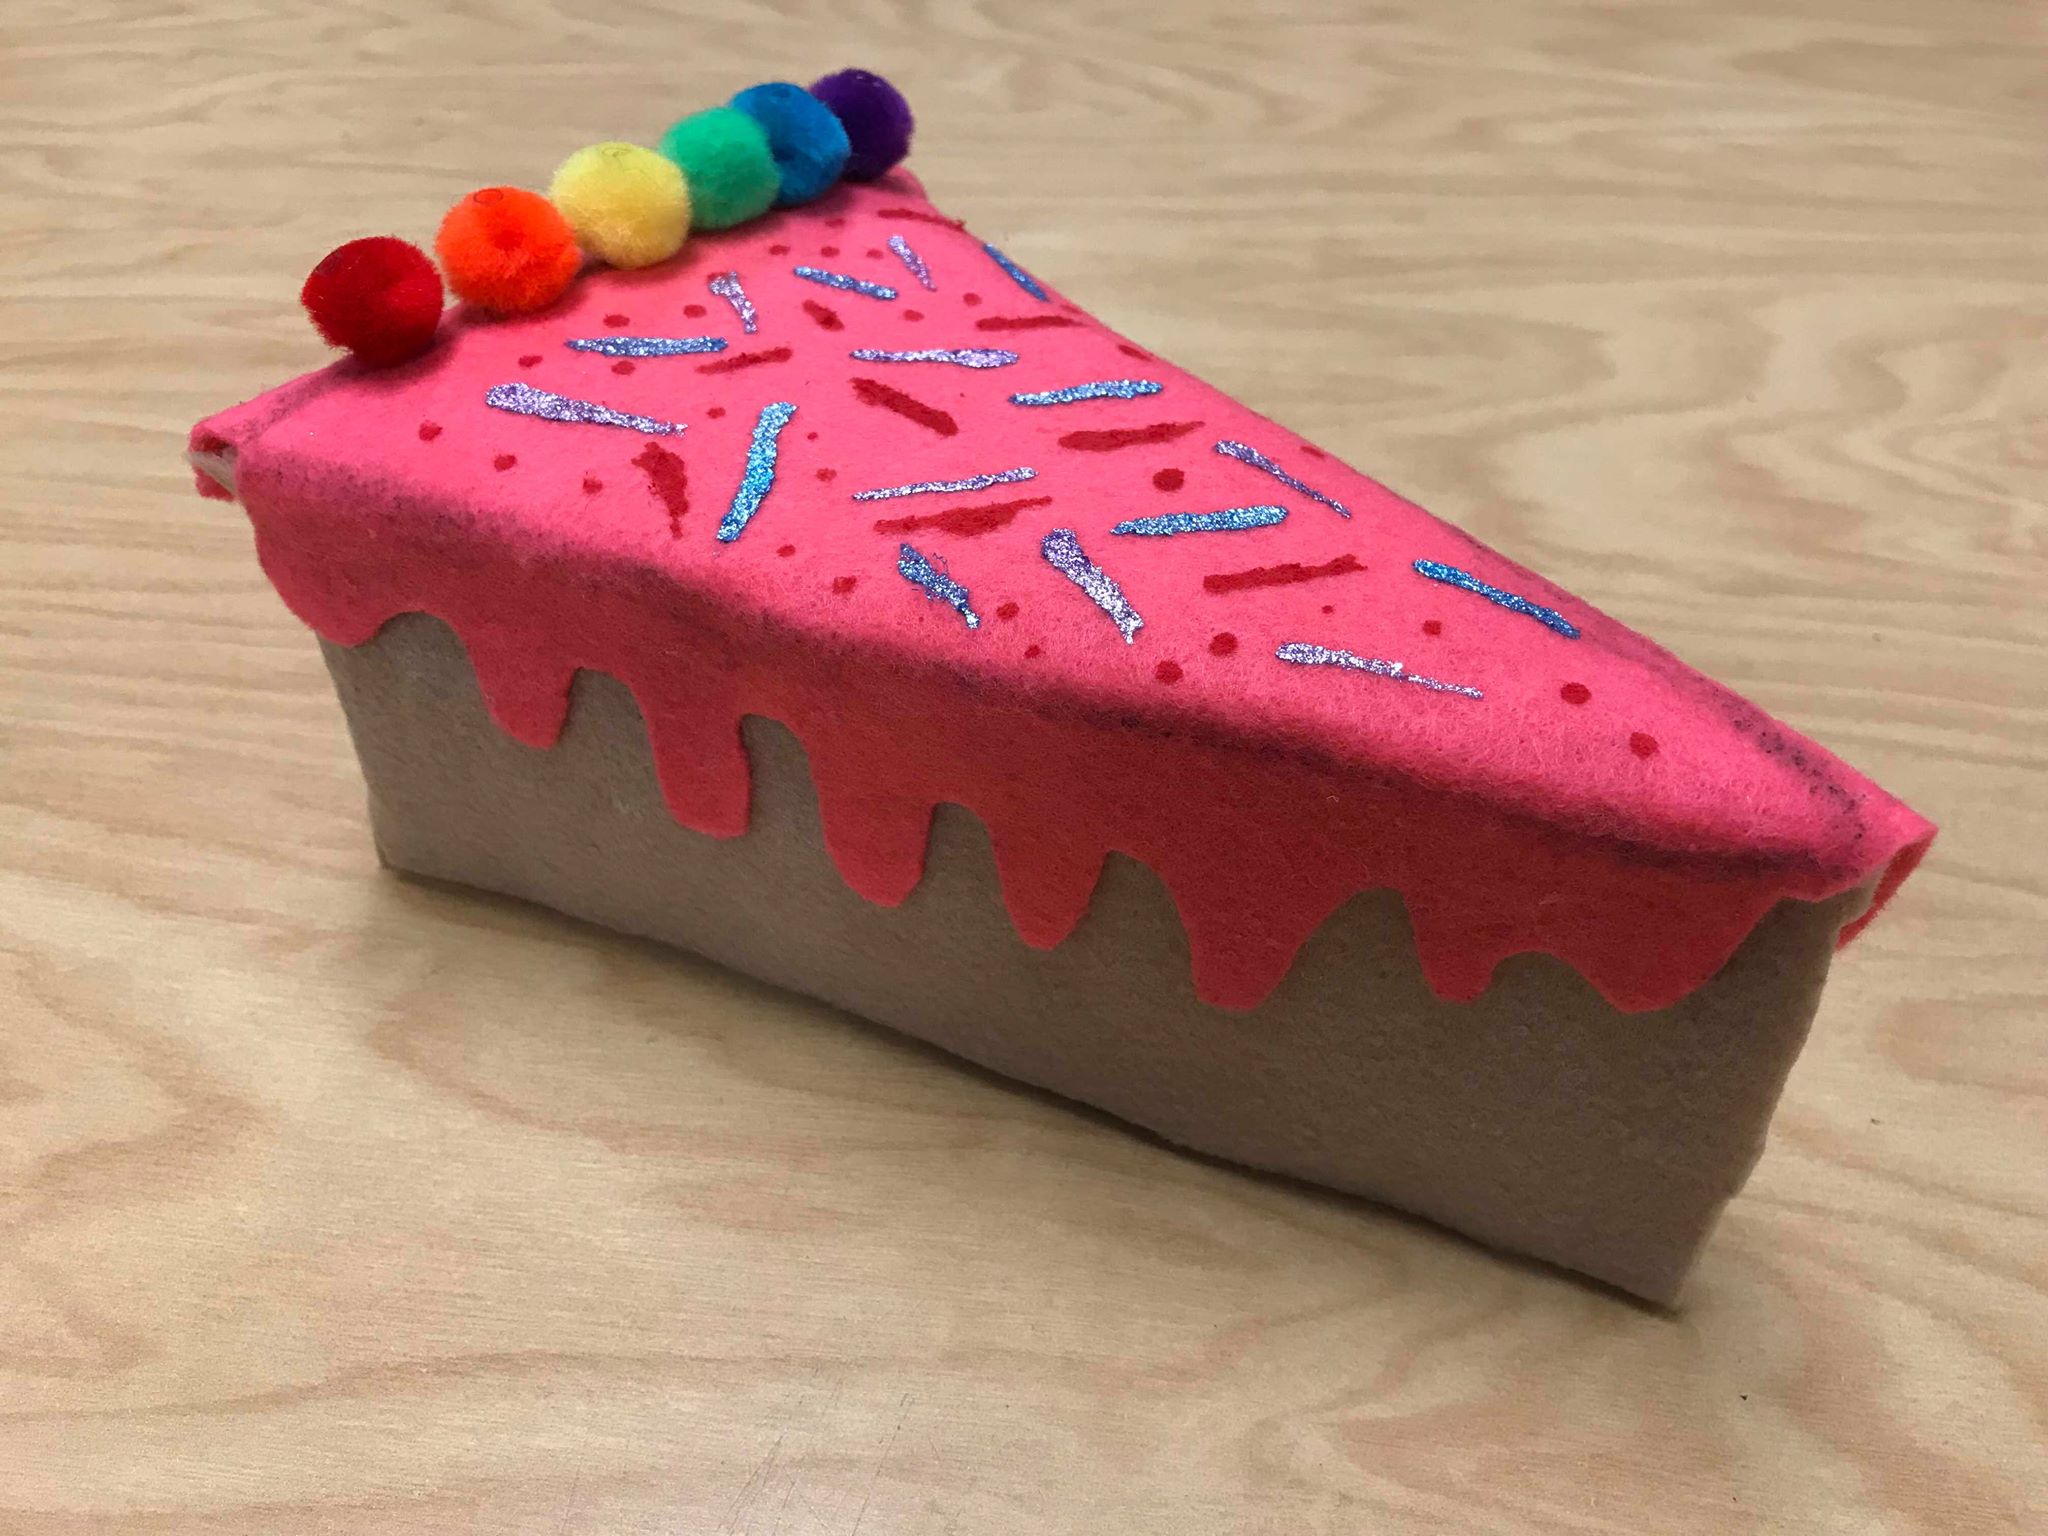
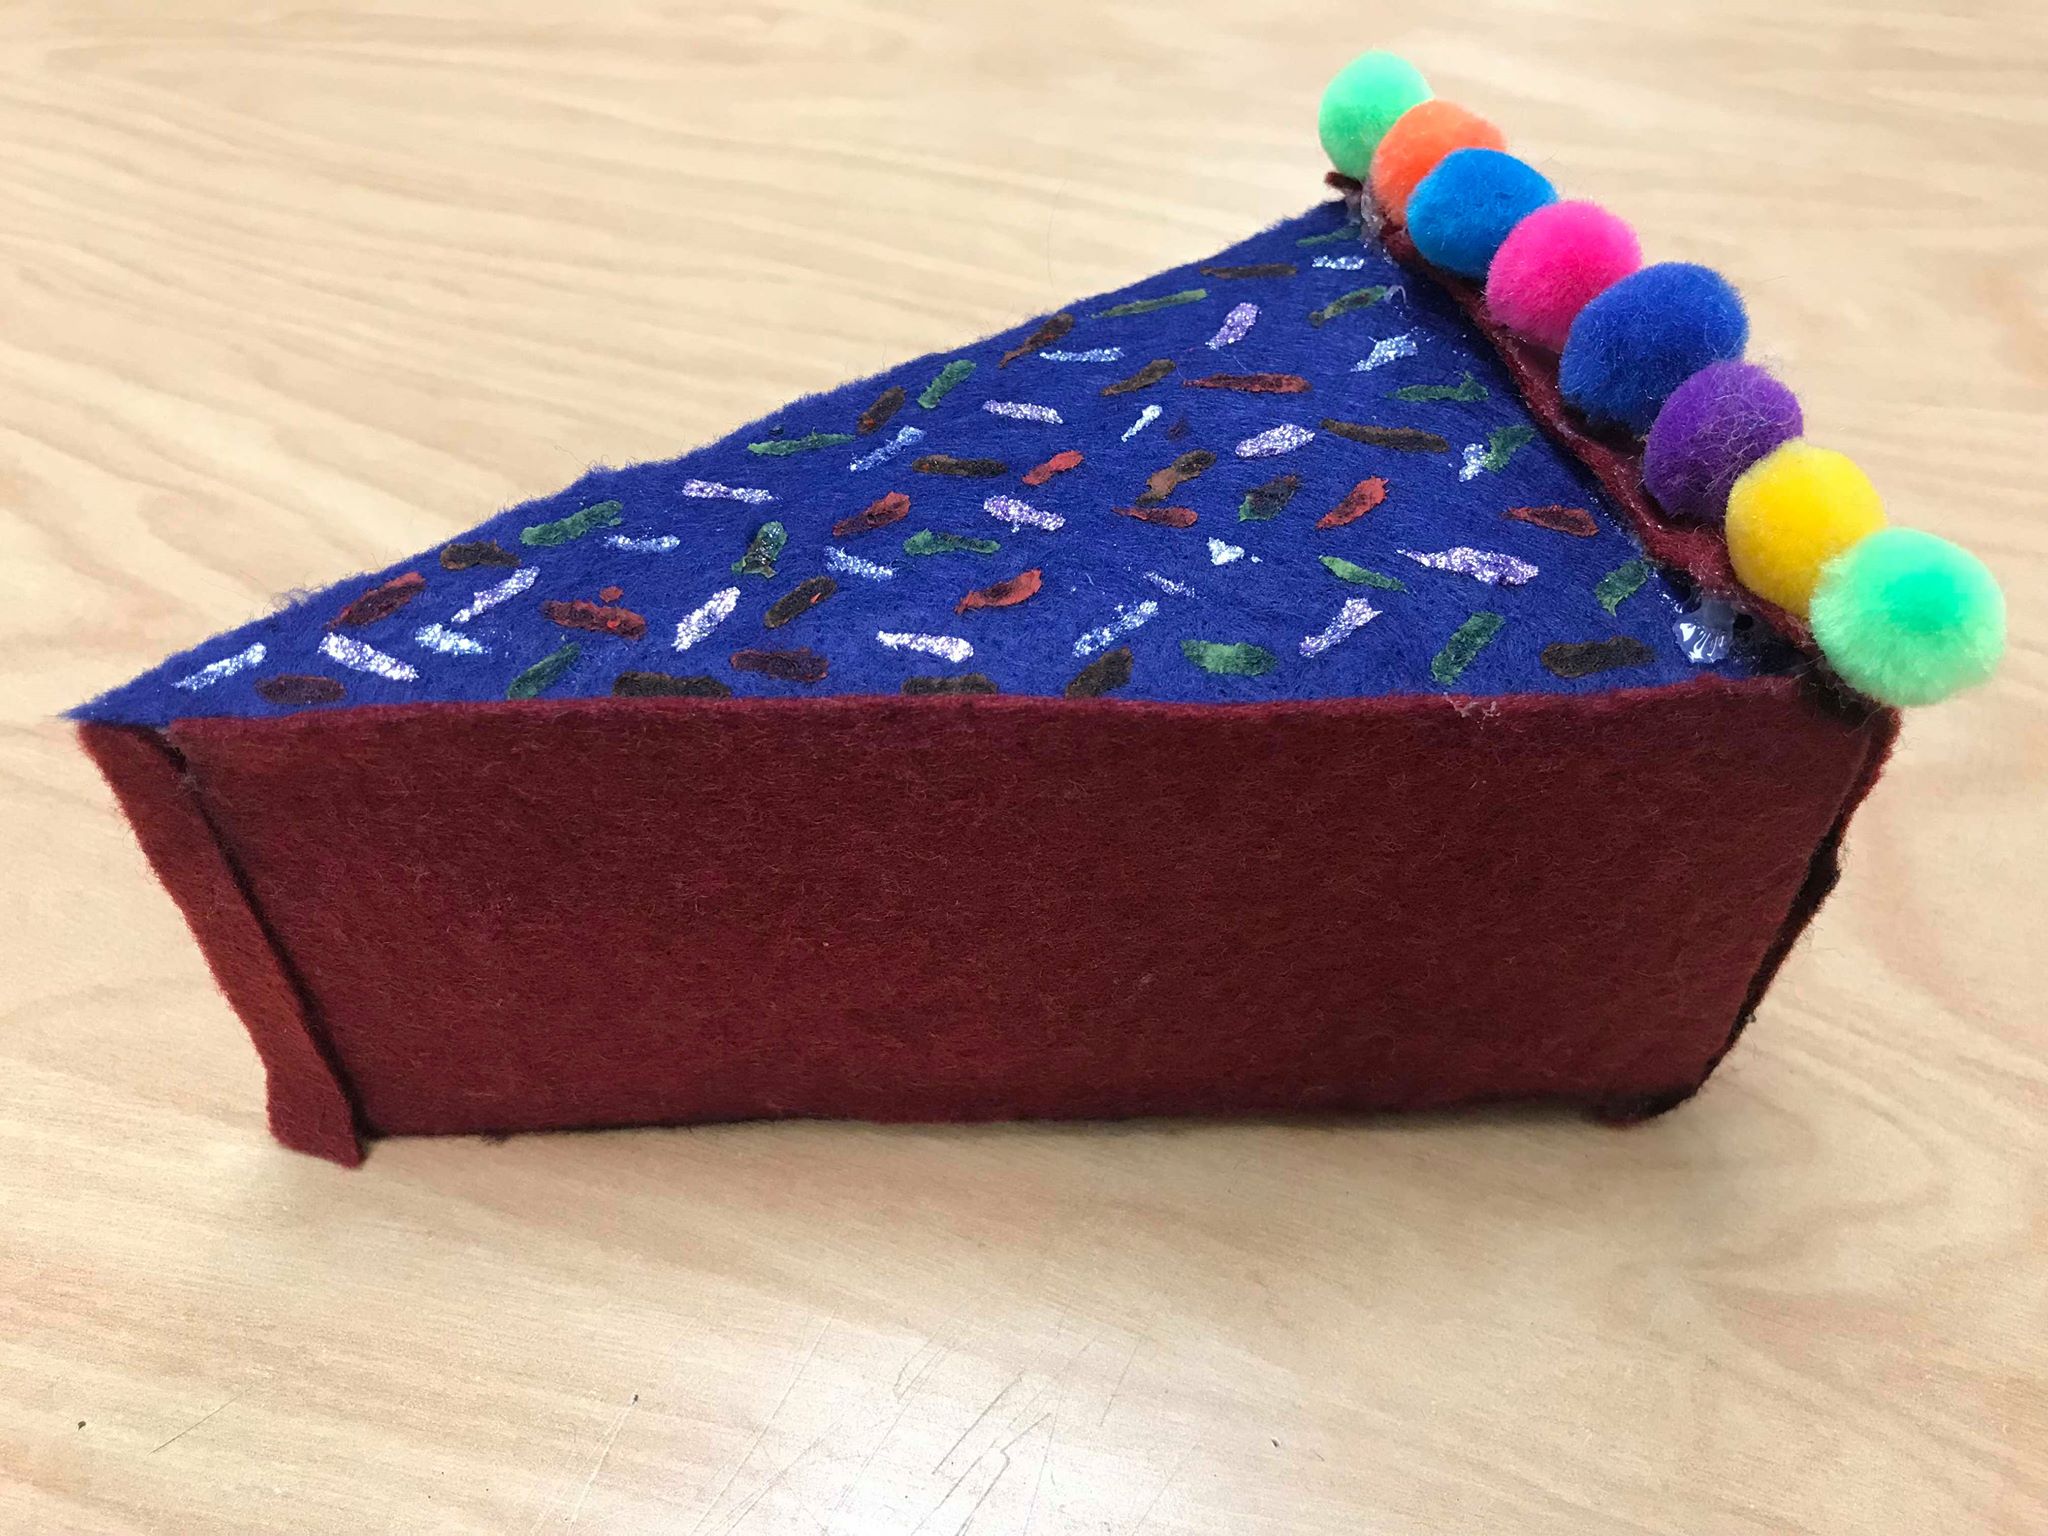
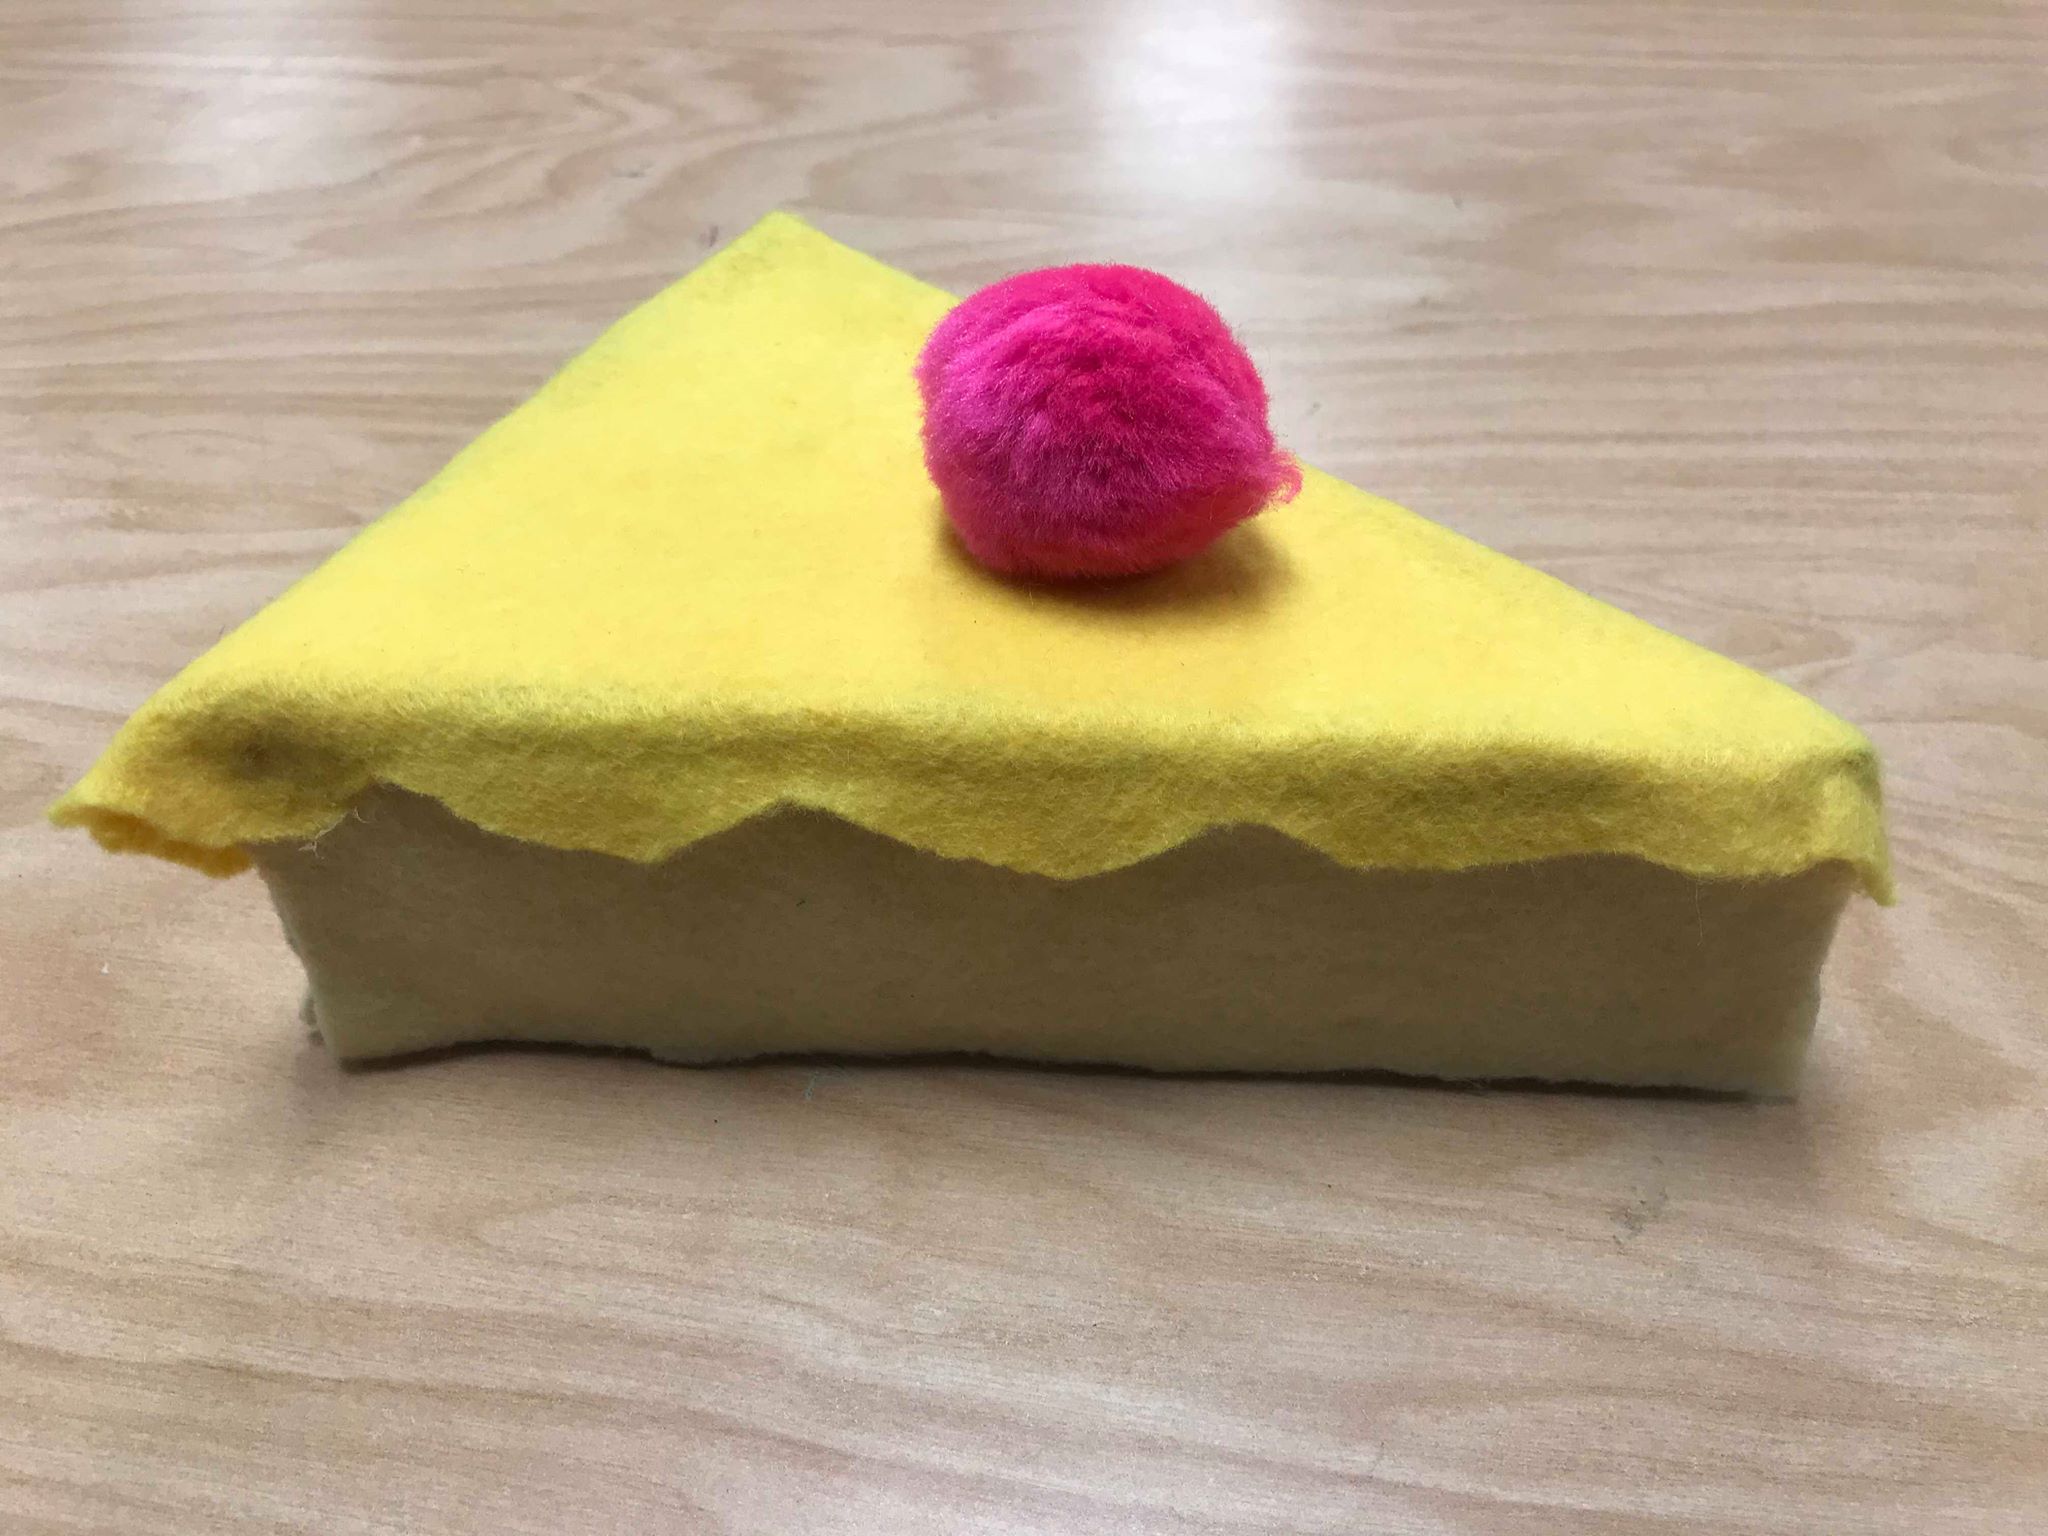
4. Once the structure is glued together and stuffed, students will attach felt directly on top of the card stock structure. They can finish off their food sculpture with fabric paint, puff balls and anything else they’d like! TIP: Students should use fabric glue to put their felt portion together NOT regular glue or hot glue. Fabric glue has more grip and by having a bottle at each table means students won’t be out of their seats using a hot glue gun.
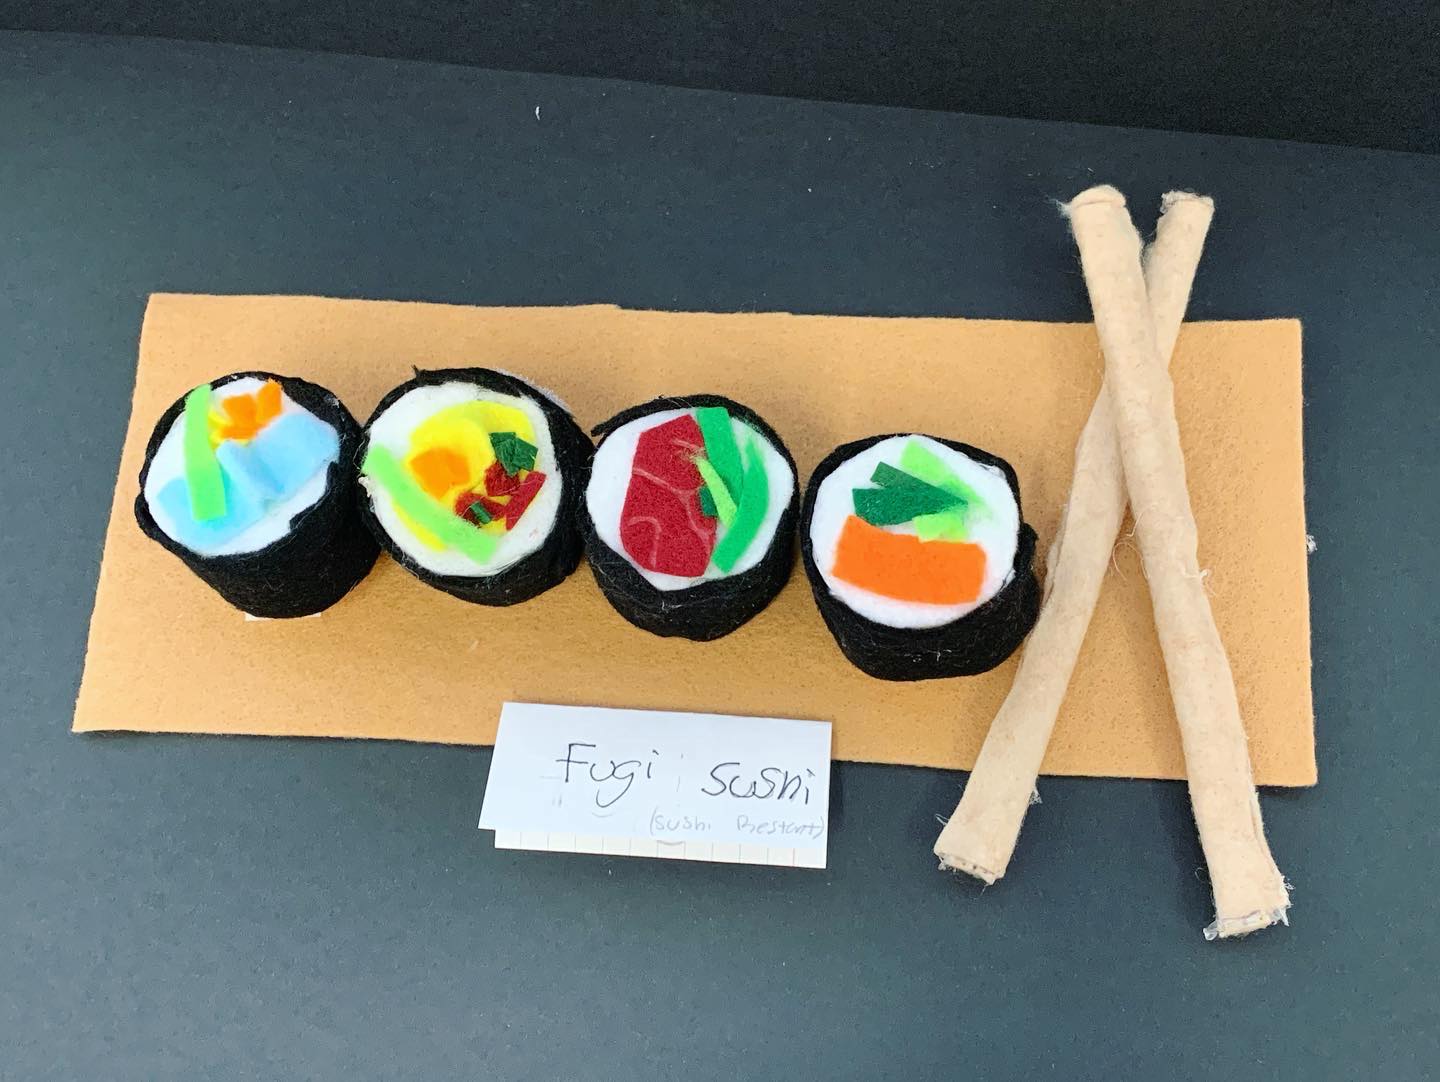
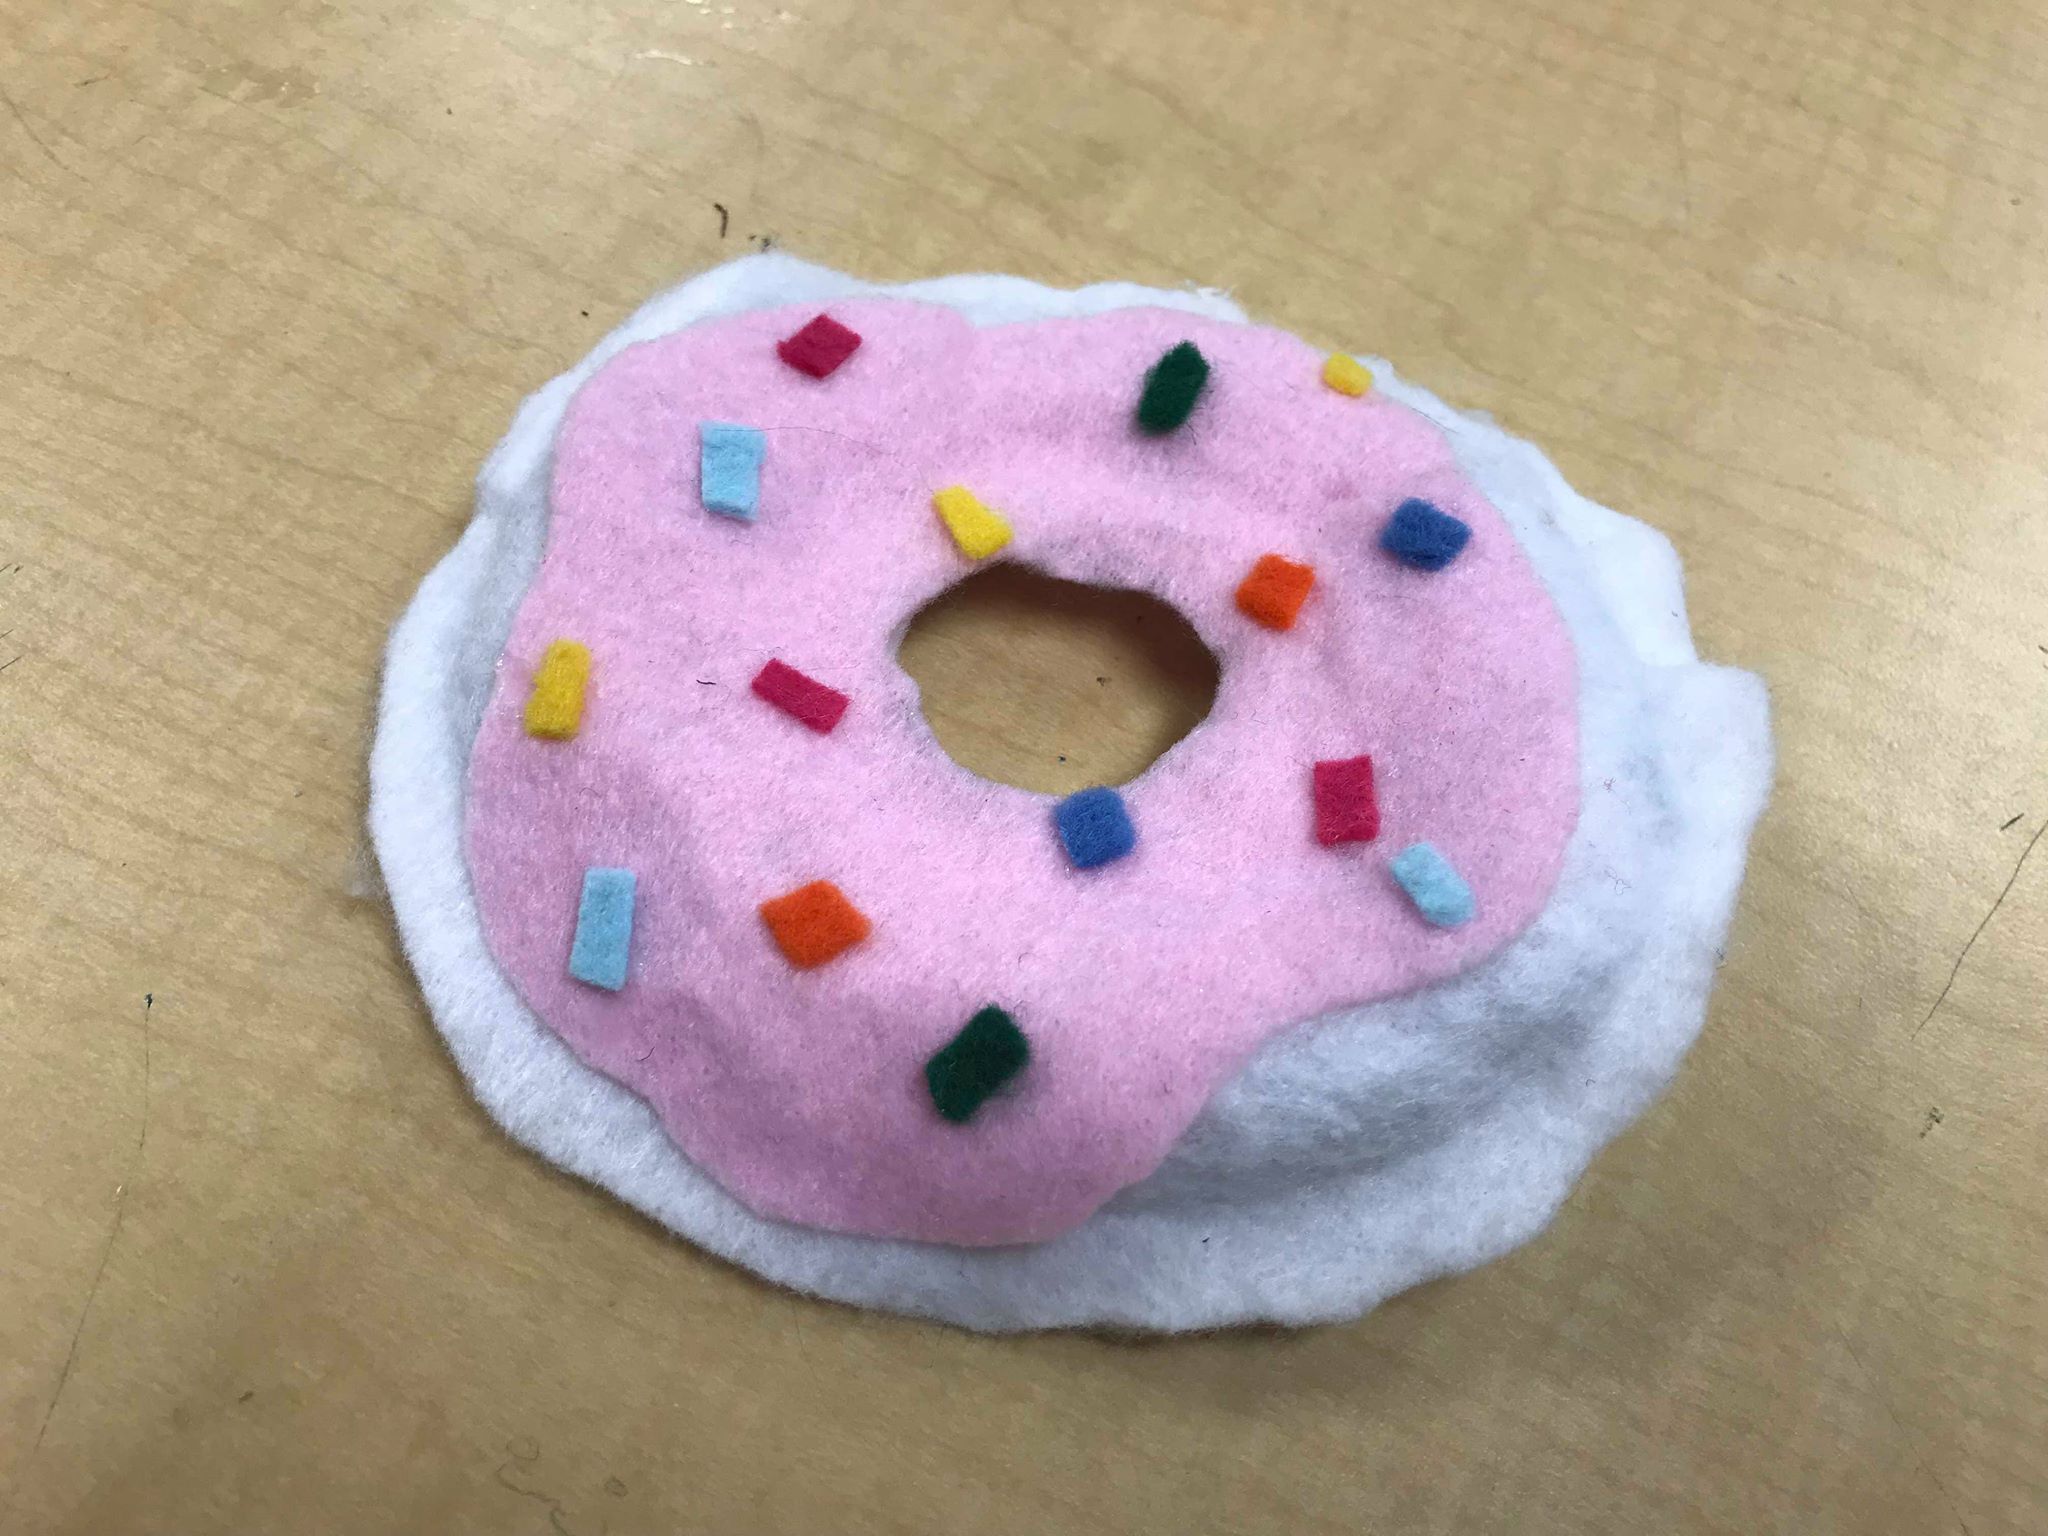
Below are student examples. Students who chose not to make a cake still needed to use tabs. However, students who wanted to make cookies, donuts, M&Ms and skittles did not need to make a card stock structure. Those students started directly with felt and stuffing.
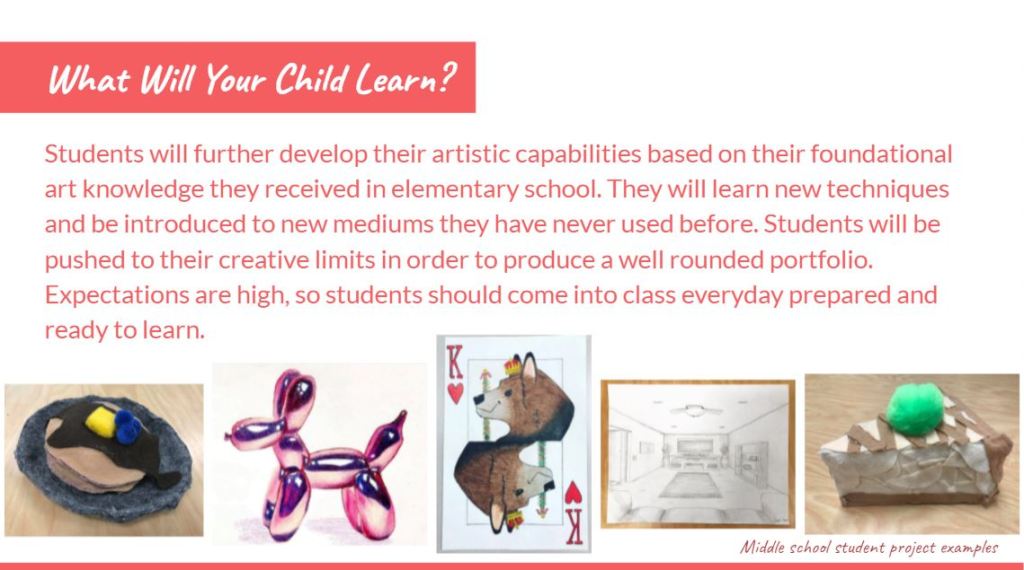
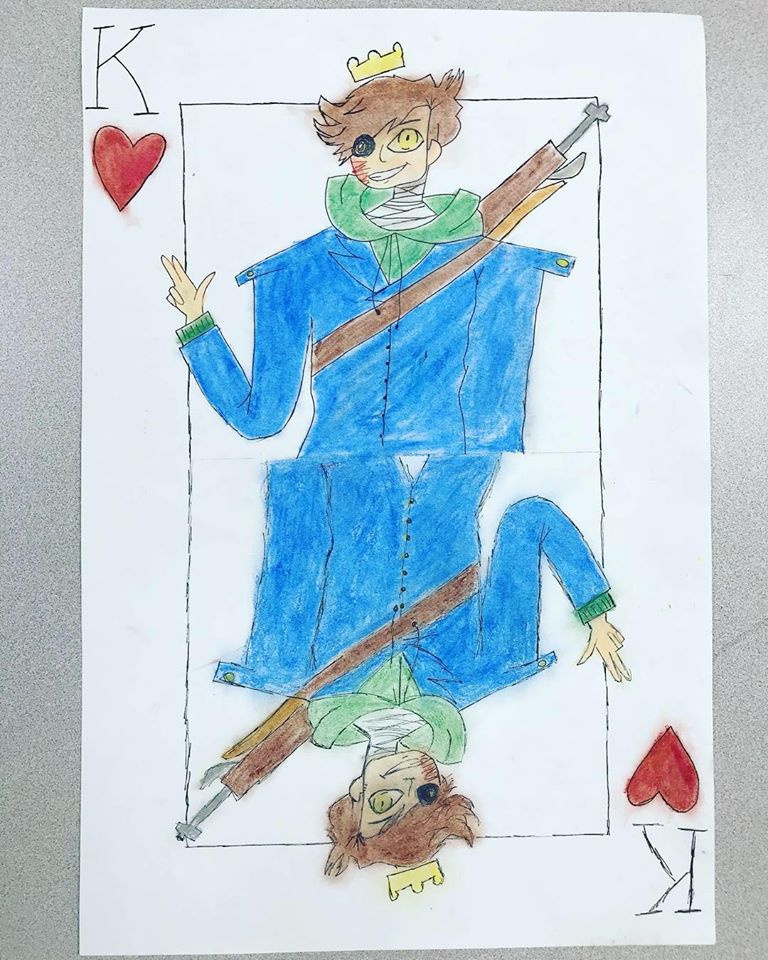
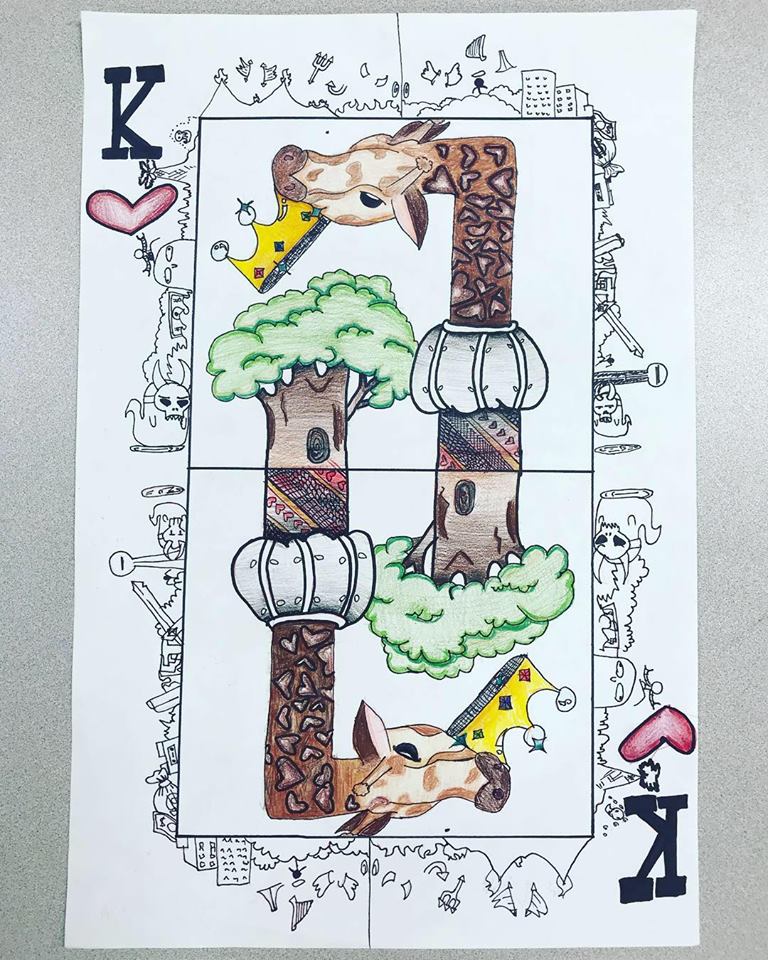
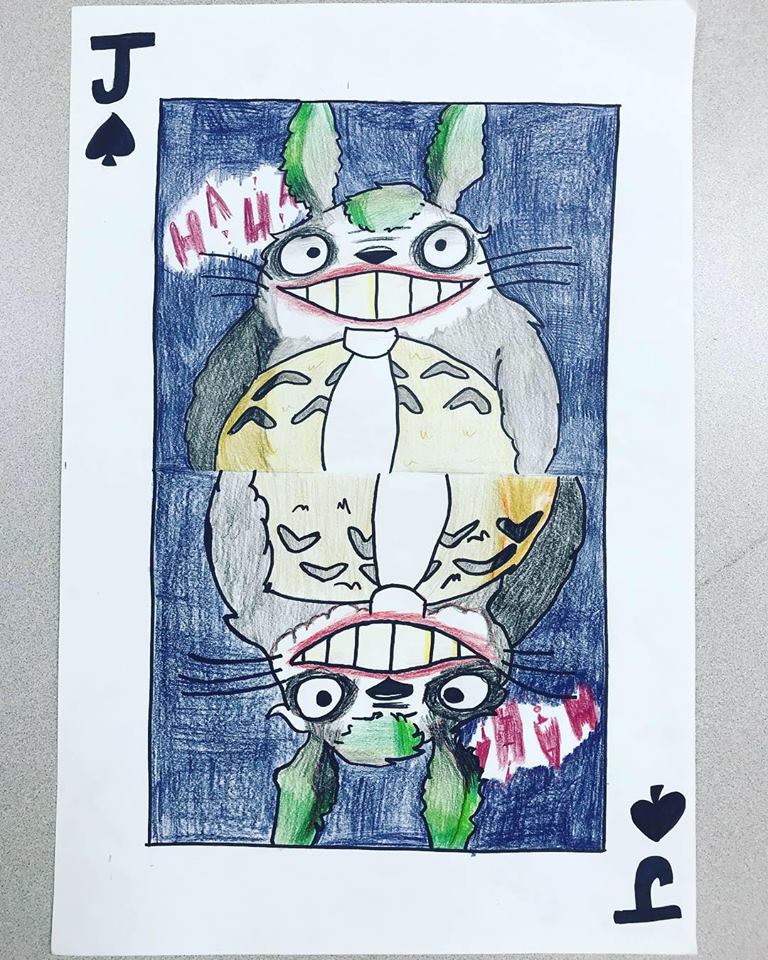
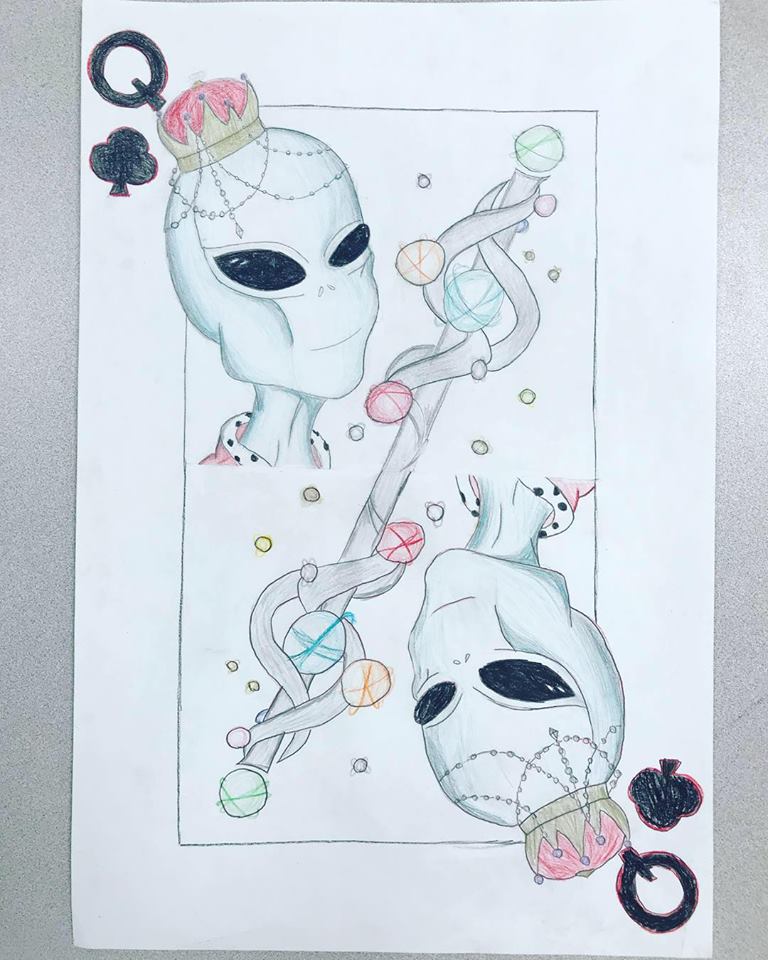
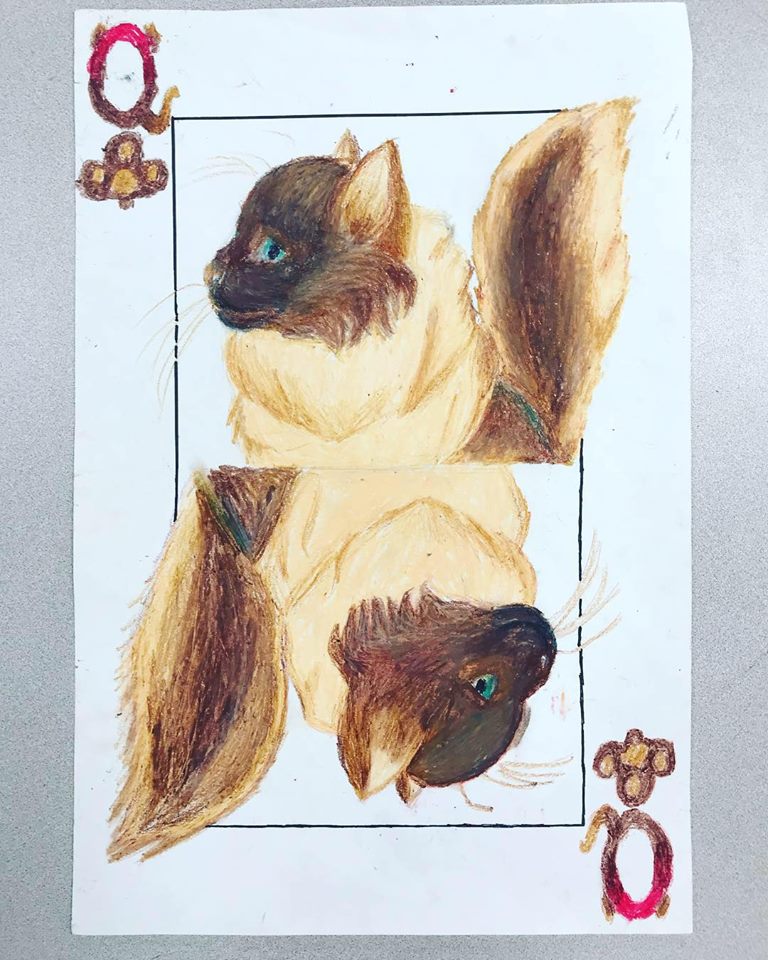
This project was BY FAR the most talked about lesson throughout the school year. It is best suited for upper middle school and/or high school level students. This project pushed their creative limits and forced them to talk to/ work with someone they did not know in the class.
Here is the intro PowerPoint. It covers the 3 types of symmetry and has the basic guidelines for the project.
There are TWO approaches you can take for this lesson. The first option is what I did and it goes along with guidelines mentioned in the PowerPoint. The second option allows the teacher to have more control over the project rather than the students. Both options require a large sheet of drawing paper per student, tracing paper and transfer paper.
OPTION ONE:
Students will design only one half of a playing card. They get to choose whatever subject matter and medium they feel comfortable with.
Once the image is drawn and colored, they will use tracing AND transfer paper to transfer the basic outline of the image onto the other side of the playing card.
Students will then be assigned a partner either by luck of the draw (pulling student names out of a hat is what I did) or the teacher can assign students beforehand.
The students will be in charge of teaching their partner how to execute their original image/concept. This part will require constant communication from both students.
The objectives (goals) are to: learn how to communicate effectively, build critical thinking skills and create a symmetrical design. BONUS goal is that they make a new friend!
OPTION TWO:
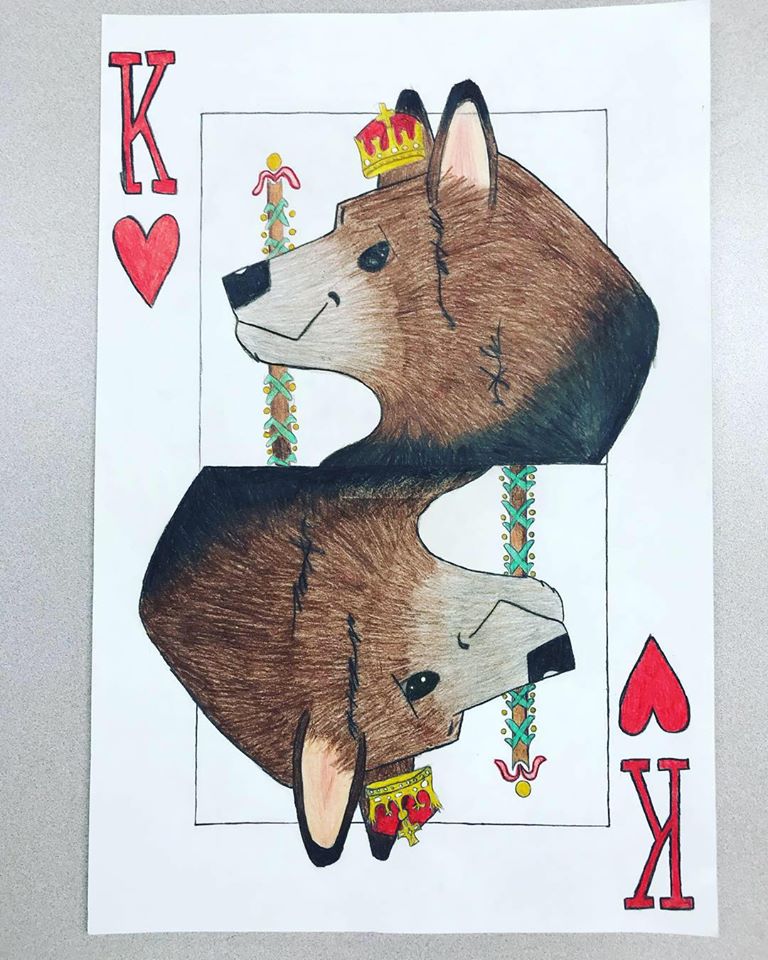
Students will start by designing one half of a playing card. They will later be in charge of completing both sides themselves. Students will choose an animal as their subject matter. They will be limited to colored pencils as their medium.
Once the image is drawn and colored, they will use tracing AND transfer paper to transfer the basic outline of the image onto the other side of the playing card.
Students will then be in charge of replicating their coloring again on the opposite side.
The objectives (goals) are: to develop consistency, craftsmanship and patience.
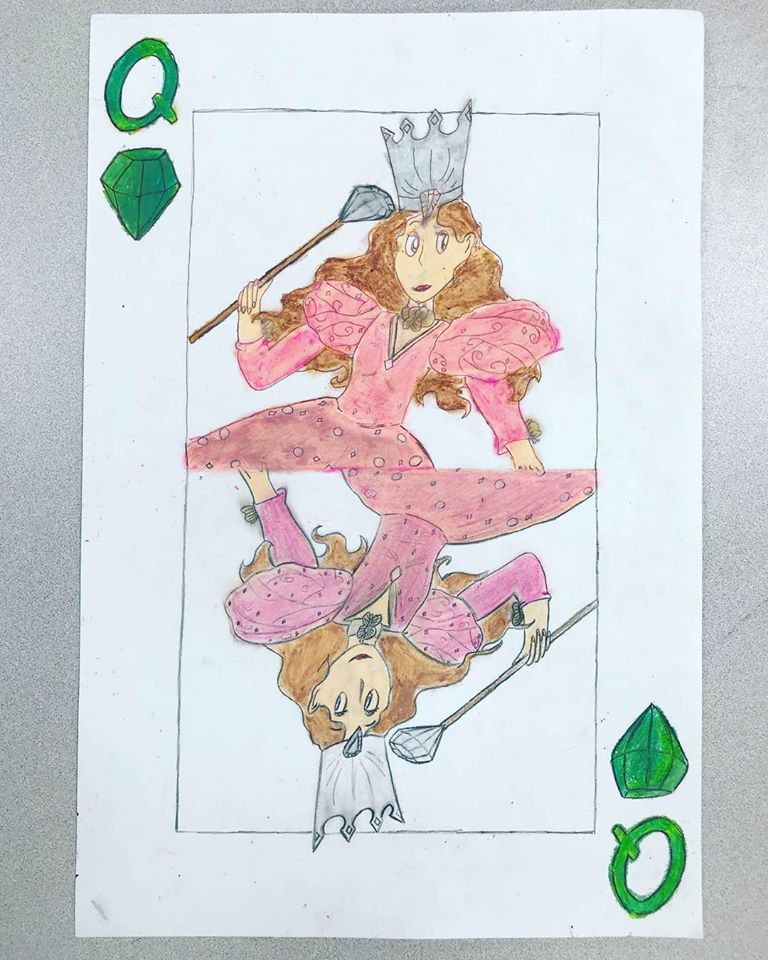
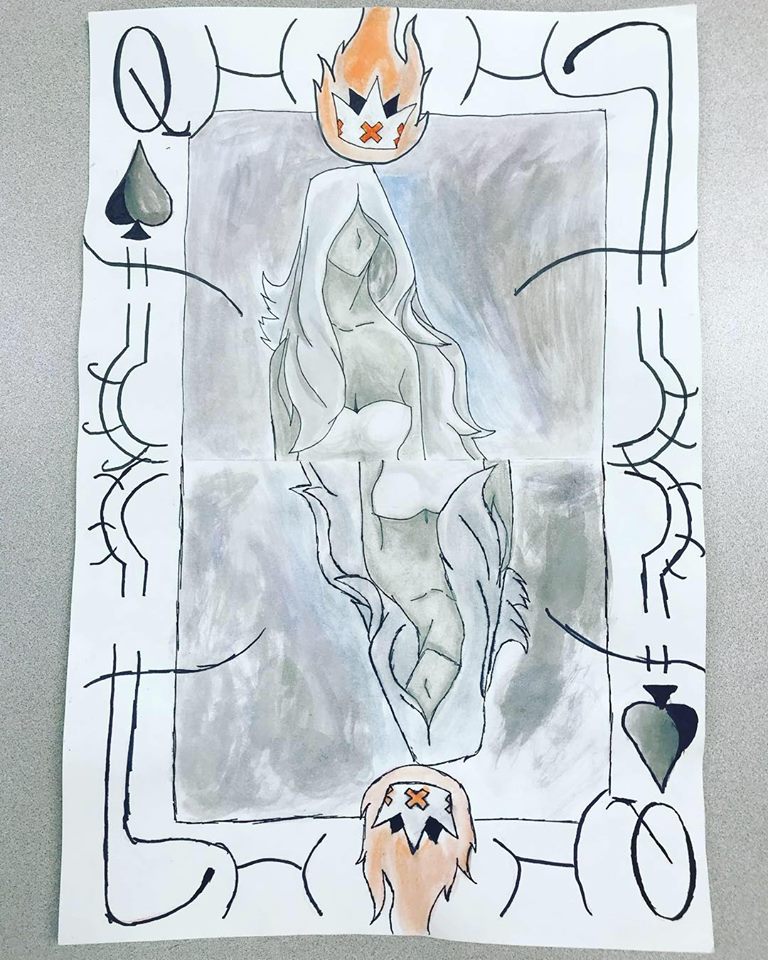
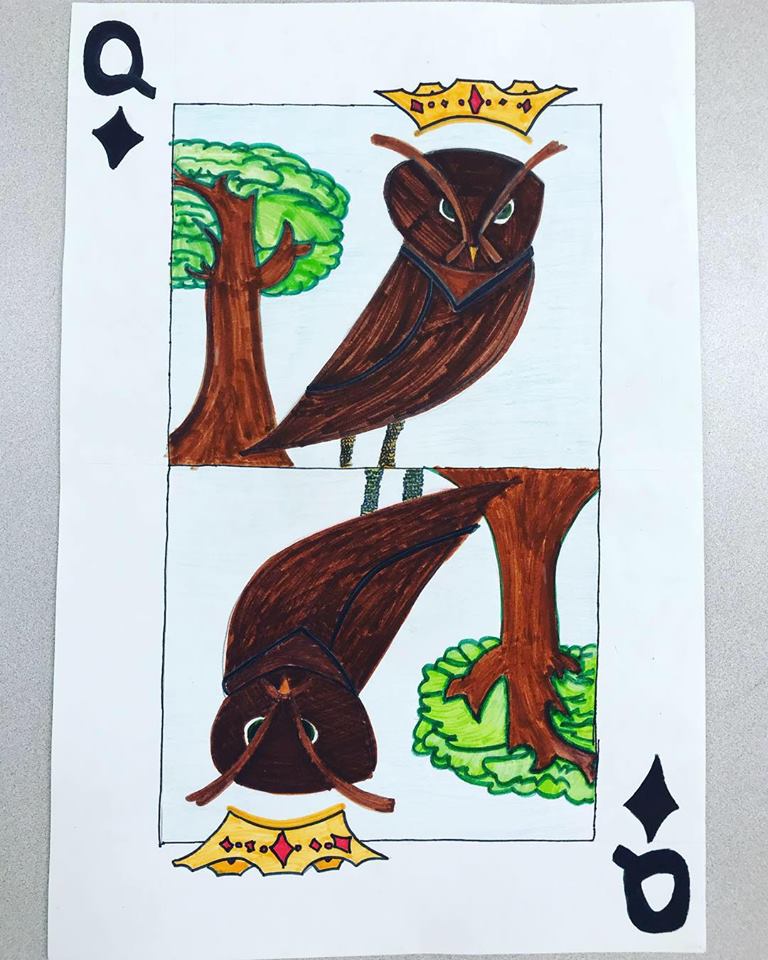
Below are upper middle school student examplesdone using OPTION ONE.
Most students were 8th graders but a couple were 7th graders. Each card was completed by 2 students.


